
Video Proxies: Edit Lightweight Copies, Export From Originals
Understand video proxies, create lightweight editing copies, reconnect original media, and check Premiere or Final Cut Pro before final export.


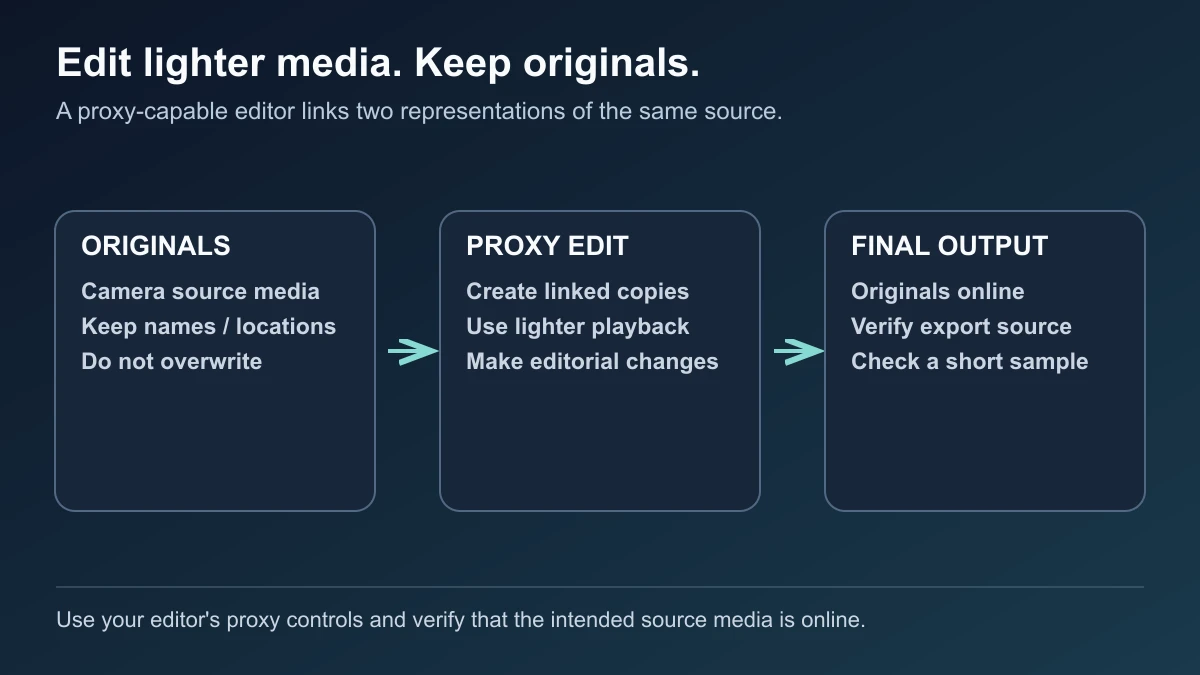
Video proxies are lightweight copies of source footage that an editor uses while cutting, with the original media available for finishing and final output.
They are useful when footage is difficult to play smoothly during an edit. A proxy workflow keeps a relationship between each working copy and its source, allowing the timeline's edit decisions to use the originals later. It is different from making a smaller finished video to upload.
What video proxies change in an editing workflow
Adobe describes proxies as lower-resolution working copies for editing demanding media, including footage created outside Premiere. The originals remain the source for finishing. See Adobe's ingest and proxy overview.
| File or setting | Purpose |
|---|---|
| Original camera media | Source pictures and sound to preserve for finishing |
| Attached proxy media | Alternative working files used during editing |
| Reduced viewer resolution | A playback setting; it does not necessarily create another media file |
| Delivery export | A rendered video intended for viewers or an upload destination |
A 4K source might have a smaller proxy while the project still targets a 4K output. Selecting that output size cannot restore detail if the export actually reads only a small proxy. The source used for rendering matters as much as the dimensions selected in the export window.
Decide whether proxies solve your problem
Try a representative clip in the editor first. Scrub, play the section with movement, and check a short sequence containing the effects you expect to use. If the source already plays adequately, continue with the originals.
Proxies are worth considering for demanding footage, several simultaneous camera views, or editing on a machine that struggles with the source. They do not replace a backup, and generating them adds preparation and storage needs. A short founder update may need only straightforward cuts; a larger production may justify the extra media workflow.
Also check whether the slowdown comes from an effect rather than basic source playback. A lightweight copy cannot guarantee that every processing-heavy section becomes responsive.
Create and attach proxies in Premiere
For footage already imported into Premiere:
- Select the original clips in the Project panel.
- Right-click and choose Proxy → Create Proxies.
- Choose a frame size and preset. Adobe documents Half and ProRes QuickTime Proxy as defaults.
- Choose a destination, keeping proxy files clearly separated from originals.
- Optionally enable a proxy watermark to make the working copies recognizable.
- Click OK and monitor the jobs in Premiere or Adobe Media Encoder.
These steps follow Adobe's Create proxies guide. Let the required jobs finish before relying on the copies. Then enable Toggle Proxies in the monitor to use attached proxies for playback. Adobe documents that control in its monitor overview.
For externally generated copies, select their original clips in the Project panel and use Proxy → Attach Proxies. Choose suitable matching properties, locate the corresponding proxy, and confirm. Adobe's attachment instructions describe filename and timecode matching.
Do not import the proxy folder as unrelated footage if your intention is an attached workflow. Give clips unique identities, especially when two camera cards contain the same filenames. After attachment, inspect several clips at different points to confirm that each copy shows the correct take.
Relink carefully when originals move or arrive later
Keep the original folder structure stable during editing. If a drive letter, volume, or folder changes, reconnect the source files before final output.
Premiere also supports starting with proxy media and later associating the full-resolution sources. Select the relevant clips in the Project panel, choose Proxy → Reconnect Full Resolution Media, set the matching properties, and locate the correct source. Adobe documents this in Reconnect full-resolution media.
Check identity rather than accepting a filename match blindly. Compare the opening frame, an identifiable action, and the end of the take. For a spoken demonstration, also check that the mouth movement and sound still correspond.
If a proxy was trimmed or retimed independently before attachment, stop and investigate the mismatch. Renaming it to resemble the original does not make its content correspond.
Export from originals: Premiere and Final Cut Pro differ
In Premiere, full-resolution media is used by default for export even when proxy playback is enabled. To intentionally export using proxies, Adobe documents Export → Media File → General → Use Proxies. For a final export from originals, leave that option off and ensure the sources are online. Adobe's export behavior.
In Final Cut Pro, open the viewer's View menu and switch Media Playback to Optimized/Original before sharing. Apple explicitly requires this step for the highest-quality output after proxy playback. Proxy Preferred can fall back to original or optimized media; Proxy Only shows a missing-proxy warning when a copy is unavailable. Apple's playback and sharing guidance.
Before delivery, inspect the saved file for readable text, correct framing, and the intended source detail. An output labeled 4K can still contain enlarged proxy pictures. Exporting from originals also does not mean lossless output: the chosen delivery codec and settings still affect the result.
Keep a spoken-video workflow proportionate
For a UGC explanation or lesson, import the original recording directly when it edits comfortably. BlitzCut's App Store listing documents silence removal, transcript editing, and captions for spoken content on iPhone, iPad, and Mac. The proxy-management instructions above apply to Premiere and Final Cut Pro.
If you move a finished excerpt between editors as an exported video, keep the source project too. That rendered file is a new deliverable, not an attached proxy carrying the first editor's individual clip relationships.
Frequently Asked Questions
Do proxies reduce final video quality?
Editing with them need not reduce final source quality when the export uses the originals. Exporting the proxy pictures themselves retains their limitations, regardless of the output dimensions.
Can I delete the originals after creating proxies?
Keep the originals and a backup. Proxies are working copies; deleting the sources removes the material needed for an original-quality finish.
Why does my final export look like the proxy?
Check source availability and the editor's export behavior. In Premiere, inspect Use Proxies. In Final Cut Pro, switch to Optimized/Original before sharing. Also check that you did not import proxy files as standalone originals.
Are proxies the same as compressing a video for uploading?
No. Proxy media supports editing and a return to source footage. Upload compression creates the delivery file that viewers receive. The two workflows serve different stages.
Related Guides
Editing a talking-head video?
BlitzCut is available on Android, iPhone, iPad, and Mac. It is designed for recorded UGC-style videos, founder-led ads, tutorials, and testimonials and other talking-head content.
Try it for freeRelated Articles
Keep Reading

Best Lavalier Mic for iPhone (2026): Wireless and Wired Picks for TikTok and Reels
The best lavalier mic for iPhone: DJI Mic Mini for most creators, RØDE Wireless Micro for two people, DJI Mic 3 for backup recording, and a wired lav under $30. Compared for TikTok, Reels, and Shorts.

Best Mac App to Remove Silence From Video (2026): 9 Tools Compared
The best Mac apps to remove silence from video: BlitzCut for talking-head videos with captions, Recut or TimeBolt before Final Cut or Premiere, Premiere's pause filter, Descript, Gling, and free auto-editor.

Best Ring Light for TikTok and Content Creators (2026)
The best ring light for TikTok and content creators: an 18-inch kit for most talking-head videos, plus 10-, 14-, and 21-inch picks compared by brightness, portability, and price.