How to Turn a Video Interview into Text on Mac
Auto-transcribe interviews on Mac with on-device AI in 2026. No upload, no wait — perfect for journalists, coaches, and course creators.

A video interview is an information-dense recording that becomes much more useful the moment it exists as text. As text, you can search for the exact quote you need. You can pull specific moments for a social clip. You can restructure an hour of conversation into a 1,500-word article. You can share it with an editor, a producer, or a collaborator without them watching the full video.
Converting a video interview to text on Mac in 2026 takes minutes, not hours — and for many use cases, it costs nothing. The right tool depends on whether you need a transcript document, a captioned social clip, or both.
Which Tool Matches Your Use Case
Before picking a tool, identify what you actually need out the other end:
| What you need | Best tool |
|---|---|
| Plain text transcript for writing, research, or notes | MacWhisper (free) or Whisper CLI (free) |
| SRT file for YouTube captions or platform upload | MacWhisper, Descript, or Rev |
| Editable transcript connected to the video | BlitzCut or Descript |
| Social clip with karaoke captions from the interview | BlitzCut |
| Speaker-labeled transcript (who said what) | Otter.ai or Descript |
| Human-verified accuracy for legal or journalistic use | Rev human transcription |
Most Mac users doing interview transcription in 2026 need either a plain transcript file or a captioned clip — not both from the same tool. Match the tool to the output.
Method 1: MacWhisper — Free, On-Device, Fast
Best for: Journalists, researchers, coaches, course creators who need a text document.
MacWhisper is a native Mac app that runs OpenAI's Whisper model locally. Drag your interview recording in, get a transcript out. Free basic tier, $29 one-time Pro.
Step 1: Import the Interview File
Drag your video or audio file into MacWhisper. Supported formats include MP4, MOV, M4A, MP3, and most standard media formats. If your interview was recorded as separate video files (one per speaker), import the mixed stereo export, or process each file separately.
Step 2: Select a Model
For interview content with two speakers alternating:
- base — fast, reasonable accuracy, small model download
- medium — good balance of speed and accuracy (recommended starting point)
- large (Pro only) — highest accuracy, slower, best for accented speech or technical topics
On M-series Macs, medium transcribes a 30-minute interview in about 2 minutes. large takes 4–5 minutes for the same file.
Step 3: Export the Transcript
MacWhisper exports:
- TXT — clean paragraph text, readable for writing and research
- SRT — timestamped subtitle file for YouTube, Vimeo, or any platform that accepts caption files
For journalists writing an article from the interview: export TXT, then search for specific quotes and pull them into your writing. For course creators who want captions on YouTube: export SRT and upload it to the video.
Privacy: MacWhisper runs entirely on-device. Your interview recording never leaves your Mac. For sensitive interviews — medical, legal, confidential source material — this matters.
Method 2: BlitzCut — Transcript + Clip Extraction + Captions
Best for: Course creators, coaches, and content marketers who want to extract clips from interviews and publish them with captions.
BlitzCut for Mac handles the workflow from full interview recording to published social clip in one session — silence removal, transcription, clip extraction via transcript editing, caption generation, and export.
Step 1: Import the Interview
Open BlitzCut for Mac and import your interview recording. Drag from Finder or use Command+O. Accepted formats include MP4, MOV, and other standard video files from Zoom, Riverside, Ecamm, or any other recording setup.
The file stays on your Mac. Nothing uploads.
Step 2: Silence Removal (Automatic)
BlitzCut removes silence and dead air from the interview immediately after import, on-device. For interviews with natural pauses and gaps between questions and answers, this can shorten the recording by 10–20%. The silence-removed version is faster to review.
Processing: approximately 90 seconds per 10 minutes of footage, running unattended.
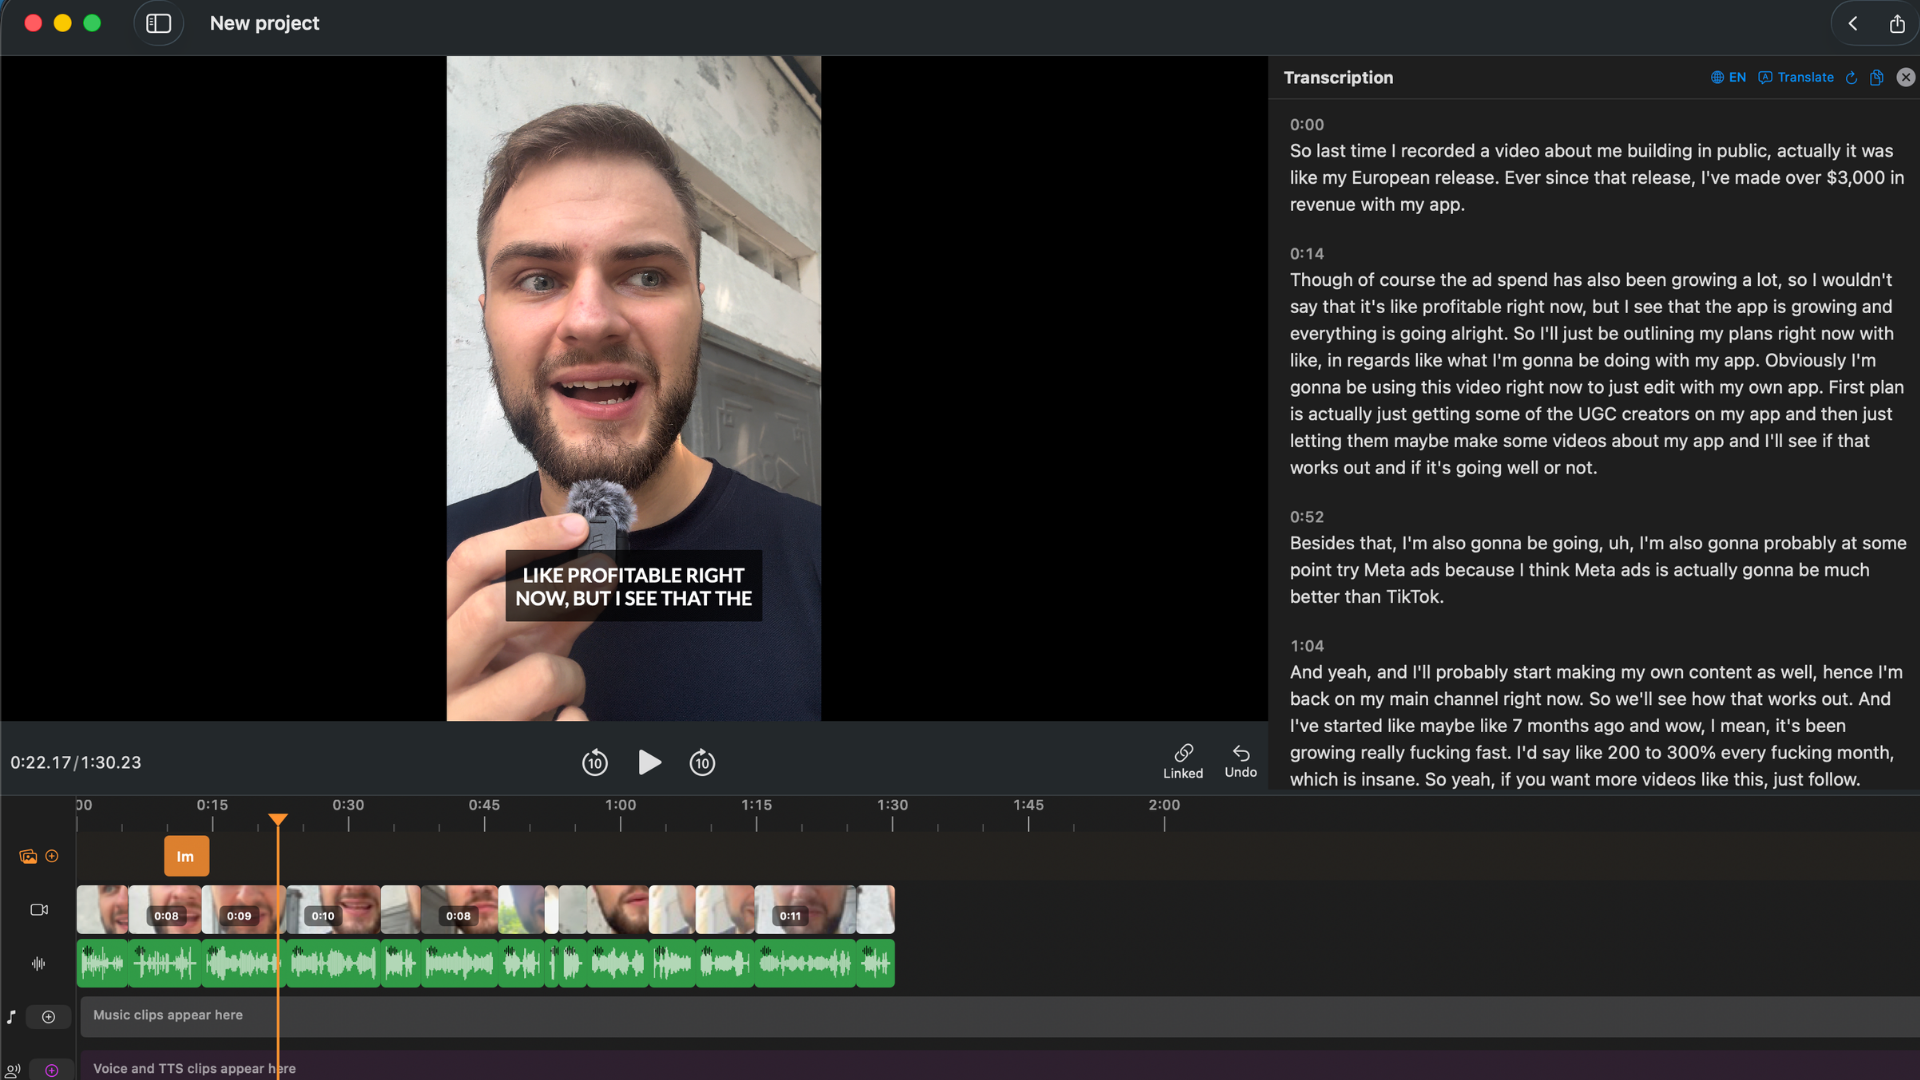
Step 3: Read the Transcript to Find the Moment
After silence removal, BlitzCut transcribes the interview. The spoken content appears as editable text in the transcript panel alongside the video.
This is the fastest way to find usable moments in an interview: read the transcript. Scanning text is 5–8x faster than watching video. You're looking for:
- Strong opinions stated clearly and concisely
- Surprising facts or statistics
- A memorable phrase or soundbite
- A specific answer to a specific question that stands alone
Once you find it, select and delete everything before the clip and everything after it. The footage updates automatically. If the speaker stumbled before the key line, delete that too. If there's a weak ending, cut it.
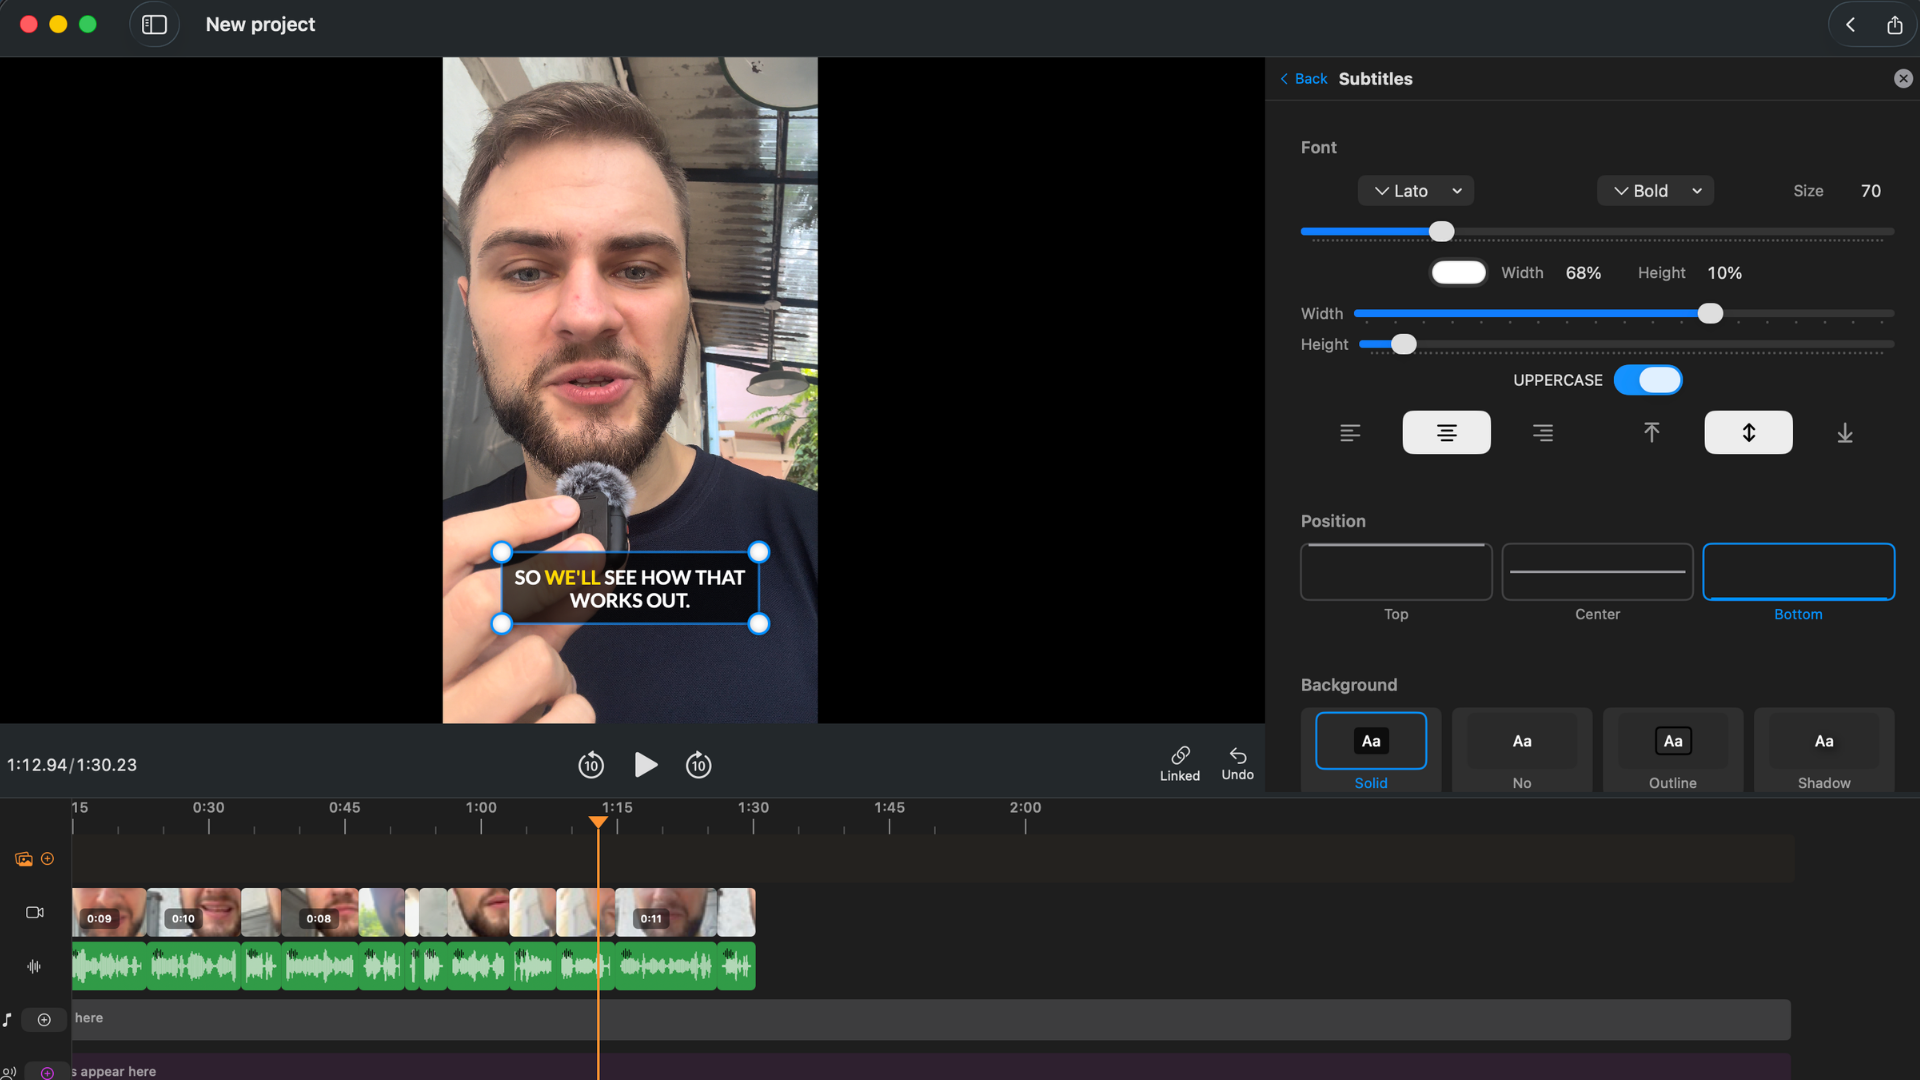
Step 4: Caption the Clip
Generate captions from the isolated transcript in one tap. For social distribution, karaoke style (word-by-word highlight) performs best on TikTok, Reels, and Shorts. Standard style works for YouTube long-form. The timing is generated automatically from the transcript — no manual adjustment.
Step 5: Export
Choose aspect ratio (9:16 for social, 16:9 for YouTube, 1:1 for LinkedIn). Export at up to 4K with no watermark.
Total time for a 60-minute interview: 15–25 minutes of active work. Silence removal and export run unattended. The active steps are scanning the transcript, isolating the clip, and styling captions.
Try BlitzCut free for 3 days →
Method 3: Otter.ai — Speaker-Labeled Transcripts for Interviews
Best for: Journalists, researchers, and anyone who needs to know who said what in a multi-speaker interview.
Otter.ai's standout feature for interview transcription is speaker diarization — it identifies when speakers change and labels the transcript accordingly. This is useful when you need a structured "Q: ... A: ..." format or when the interview has multiple subjects.
How it works: Upload the interview recording to Otter (cloud-based, upload required). Otter transcribes and labels segments by speaker. You can name the speakers after transcription. Export as TXT, DOCX, SRT, or PDF.
Accuracy: Competitive for clear two-speaker audio. Diarization accuracy degrades when speakers overlap or voices are similar in pitch.
Free tier: 600 minutes/month. A 60-minute interview uses 60 minutes of the monthly allowance. Two or three long interviews a month is within the free limit. More than that needs the Pro plan ($10/month).
The tradeoff vs MacWhisper: Otter requires uploading the interview recording to the cloud. For confidential interviews — journalism with sensitive sources, coaching clients, proprietary research — MacWhisper's local processing is the better choice.
Method 4: Rev — Human Accuracy for High-Stakes Interviews
Best for: Journalists at publications where a transcription error would be a factual error, legal and research contexts, medical interviews.
Rev offers both AI transcription ($0.25/minute) and human transcription ($1.50/minute). For a 60-minute interview, human transcription costs $90 and typically returns in 12–24 hours.
This is expensive. It's the right choice when:
- The interview subject is a public figure and errors in quotes would be professionally damaging
- The recording is the legal record of something — a deposition, a patient intake, an earnings call
- Audio quality is poor enough that AI tools produce 10%+ error rates
For standard creator, coach, or course creator interview use cases — clear audio, reasonable mic, no legal stakes — AI transcription in MacWhisper or BlitzCut is accurate enough and costs nothing.
Accuracy for Interview Recordings
Interview recordings vary based on setup. Typical accuracy ranges:
| Recording setup | Expected AI accuracy |
|---|---|
| In-person, two mics, quiet room | 96–98% |
| Remote (Riverside/SquadCast, separate tracks) | 94–97% |
| Remote (Zoom, mixed audio) | 92–96% |
| Remote (Zoom, noisy environment) | 88–93% |
| Phone call audio | 85–92% |
| Outdoor recording, ambient noise | 80–90% |
All transcript tools allow manual correction after transcription. For interview material where specific quotes will be published, always verify the transcript against the recording for quoted passages.
Privacy Considerations for Interview Transcription
Interviews often contain sensitive material — unreleased information, personal disclosures, source identities, confidential business details. The privacy model of your transcription tool matters:
Fully local (video never leaves Mac): MacWhisper, Whisper CLI. Highest privacy. No upload at any point.
No raw video upload, but uses internet: BlitzCut. Video stays on Mac; AI processing uses an internet connection. Good for most creator and coaching use cases.
Full cloud upload required: Otter.ai, Descript, Rev. Your entire recording uploads to their servers. Review the privacy and data retention policies of any service before uploading sensitive interview material.
For journalism with protected sources, legal matter recordings, or medical content: use MacWhisper or Whisper CLI. Never upload these recordings to a cloud transcription service without reviewing the data handling policies.
Turning the Transcript into Content
Once you have the transcript, the typical workflows for different use cases:
Journalists: Search the transcript for the specific quote needed. Verify the quote against the recording. Pull it into the article. The transcript is a research aid — publish verified quotes, not raw transcript text.
Coaches: Export the full transcript per session. Search it across sessions to identify themes and patterns in client language. Use specific phrases for coaching notes or program development.
Course creators: Use the transcript to write the associated lesson text, study guide, or chapter. Edit for readability — transcript language is more conversational than written content.
Content marketers: Scan the transcript for quotable moments. Pull 3–5 strong lines for social posts. Use BlitzCut to extract and caption the corresponding video moments for Reels, TikTok, and Shorts.
Frequently Asked Questions
What is the fastest way to transcribe a video interview on Mac? MacWhisper on M-series hardware — drag in the file, get a transcript in 2–5 minutes depending on length, fully on-device. For a workflow that ends in a captioned social clip rather than a document, BlitzCut is faster than combining separate transcription and editing tools.
Can I transcribe an interview on Mac without uploading it? Yes. MacWhisper and Whisper CLI run entirely locally. BlitzCut uses internet for AI processing but the video file stays on your Mac. Otter.ai, Descript, and Rev all require cloud upload.
How do I get a speaker-labeled interview transcript on Mac?
Otter.ai labels speakers automatically. Descript offers speaker identification in multi-track recordings. MacWhisper Pro and Whisper CLI with --diarize flag also attempt speaker separation, though results vary by recording quality.
What's the best free interview transcription app for Mac? MacWhisper free tier. Accurate, on-device, no upload, no account required, exports TXT and SRT. For occasional use, Otter.ai's free tier (600 min/month) also works if speaker labeling matters.
How accurate is AI interview transcription on Mac? For typical remote interview setups (Zoom or Riverside, dedicated mics), 92–97% accuracy across MacWhisper, BlitzCut, and Descript. Always verify specific quotes against the recording before publishing.
Can I turn a Zoom interview into text on Mac? Yes. Export the Zoom recording as MP4, then import into MacWhisper (for a transcript file) or BlitzCut (for an editable transcript connected to the video). Both handle Zoom audio quality well for standard recording setups.
Related: Best Video Transcription Apps for Mac 2026 · Podcast Transcription on Mac: Fastest Method 2026 · How to Auto-Transcribe a Video on Mac for Free
Post every day without spending hours editing
BlitzCut is a native App Store app for iPhone, iPad and on Mac. Get from raw footage to TikTok-ready in under 2 minutes, so editing is never the reason you didn't post.
Download BlitzCut on the App StoreRelated Articles
Keep Reading

Best Podcast Clip Makers in 2026 (Honest Comparison)
The best podcast clip makers compared: Opus Clip, Vizard, Riverside, Descript, and BlitzCut — ranked by how you actually clip, with real tradeoffs and pricing.

Best Teleprompter Apps for iPhone in 2026 (Tested)
The best teleprompter apps for iPhone: Teleprompter Premium, PromptSmart Pro, BIGVU, and free options compared — plus the editing step that makes prompter footage watchable.

How to Edit a VSL That Converts (2026 Guide)
How to edit a video sales letter: cut dead air, tighten the script after recording, add captions for muted autoplay, and pace the pitch — with the exact workflow.