macOS Video Editing for Beginners: Start Fast (2026 Guide)
Beginner's guide to video editing on Mac in 2026. Right tools, step-by-step workflow, and how to go from raw footage to published video fast.

The fastest path to editing video on Mac as a beginner in 2026: use iMovie to learn the basics (it's free and already on your Mac), and once you're editing talking head or social content regularly, switch to a purpose-built tool like BlitzCut or CapCut for Mac to automate the slow parts. You don't need Final Cut Pro or Premiere to start. You need a workflow.
Mac is one of the best platforms for video editing in 2026. Apple Silicon (M-series chips) gives even the base MacBook Air video editing performance that matched professional workstations from five years ago. The tools are excellent. The problem beginners face isn't the hardware — it's not knowing where to start, which app to use, and in what order to do things.
This guide solves that.
Can Your Mac Handle Video Editing?
Short answer: yes, almost certainly.
Any Mac with an M1 chip or newer handles 1080p editing without proxy files, renders exports fast, and runs all the major editing apps natively. 8GB of RAM is the minimum; 16GB is comfortable for 4K projects.
| Mac | What it handles well |
|---|---|
| MacBook Air M1/M2/M3 (8GB) | 1080p editing, short-form social content, AI tools |
| MacBook Air M2/M3 (16GB) | 4K editing, longer projects, multi-track audio |
| MacBook Pro M3/M4 | 4K multi-camera, complex color work, fast render |
| iMac M4 | Everything, including 6K ProRes workflows |
If you're on an older Intel Mac, video editing is still possible but slower — exports take longer and AI-powered features in tools like BlitzCut and CapCut run noticeably faster on Apple Silicon.
Apple Silicon Macs handle video editing exceptionally well, even at the base tier. The hardware isn't the bottleneck — workflow is.
The 5 Tools Every Mac Video Editing Beginner Should Know
Before choosing a tool, know what you're editing. A short TikTok and a 20-minute YouTube tutorial need different workflows. Here are the five tools covering the full range of beginner needs on Mac.
1. iMovie — Start Here
Best for: First-time editors, basic projects, learning the fundamentals
iMovie is free, pre-installed on every Mac, and works. It has a drag-and-drop timeline, handles up to 4K footage, and exports directly to YouTube, Vimeo, and your Photos library. The Storyboard and Magic Movie features help beginners structure a video without knowing what a timeline is.
What iMovie doesn't have: silence removal, AI captions, or transcript editing. For casual projects and learning, it's excellent. For regular content creation — especially talking head or social video — the missing features become real friction.
Try iMovie when: You've never edited video before. It's genuinely the best first app.
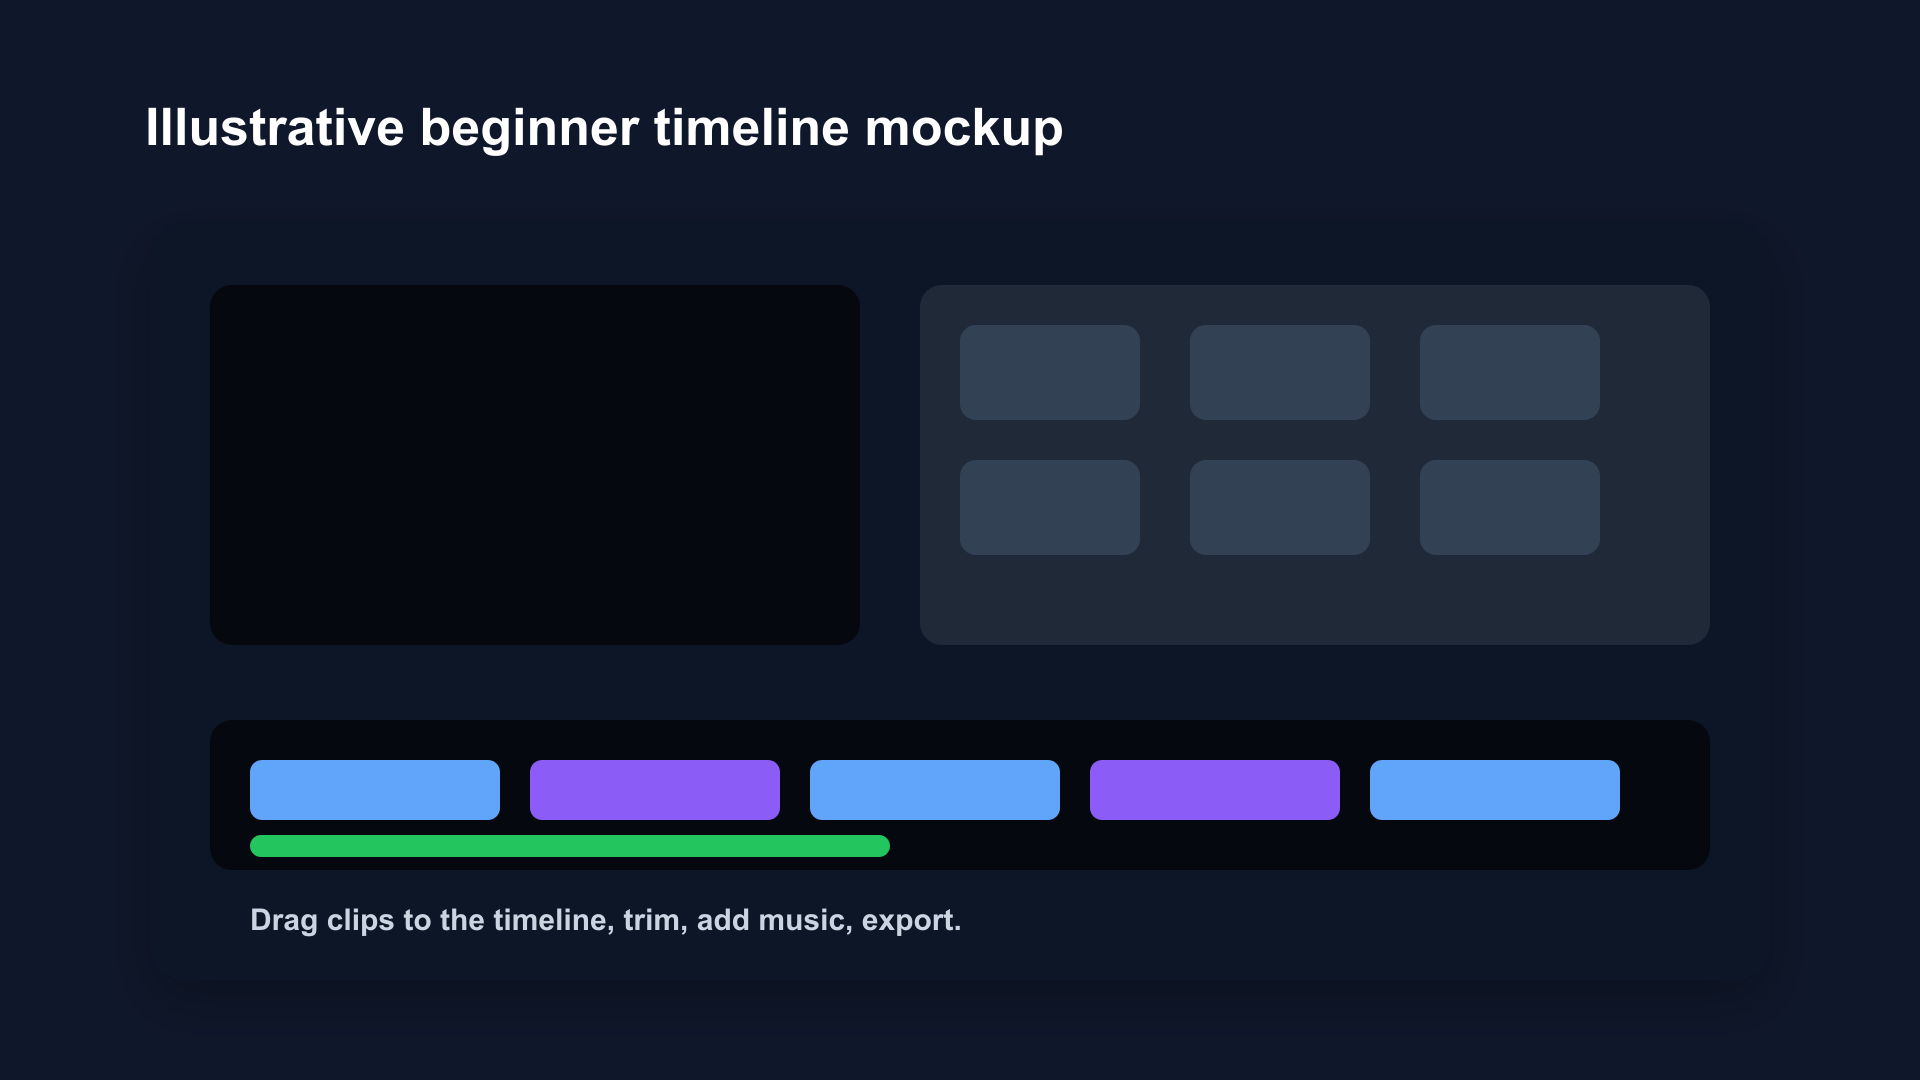
Illustrative beginner timeline mockup. iMovie's timeline is the simplest starting point for Mac beginners: free and already on your Mac.
2. BlitzCut — Fast for Talking Head and Social Content
Best for: Beginners creating talking head videos, podcasts, tutorials, or social clips regularly
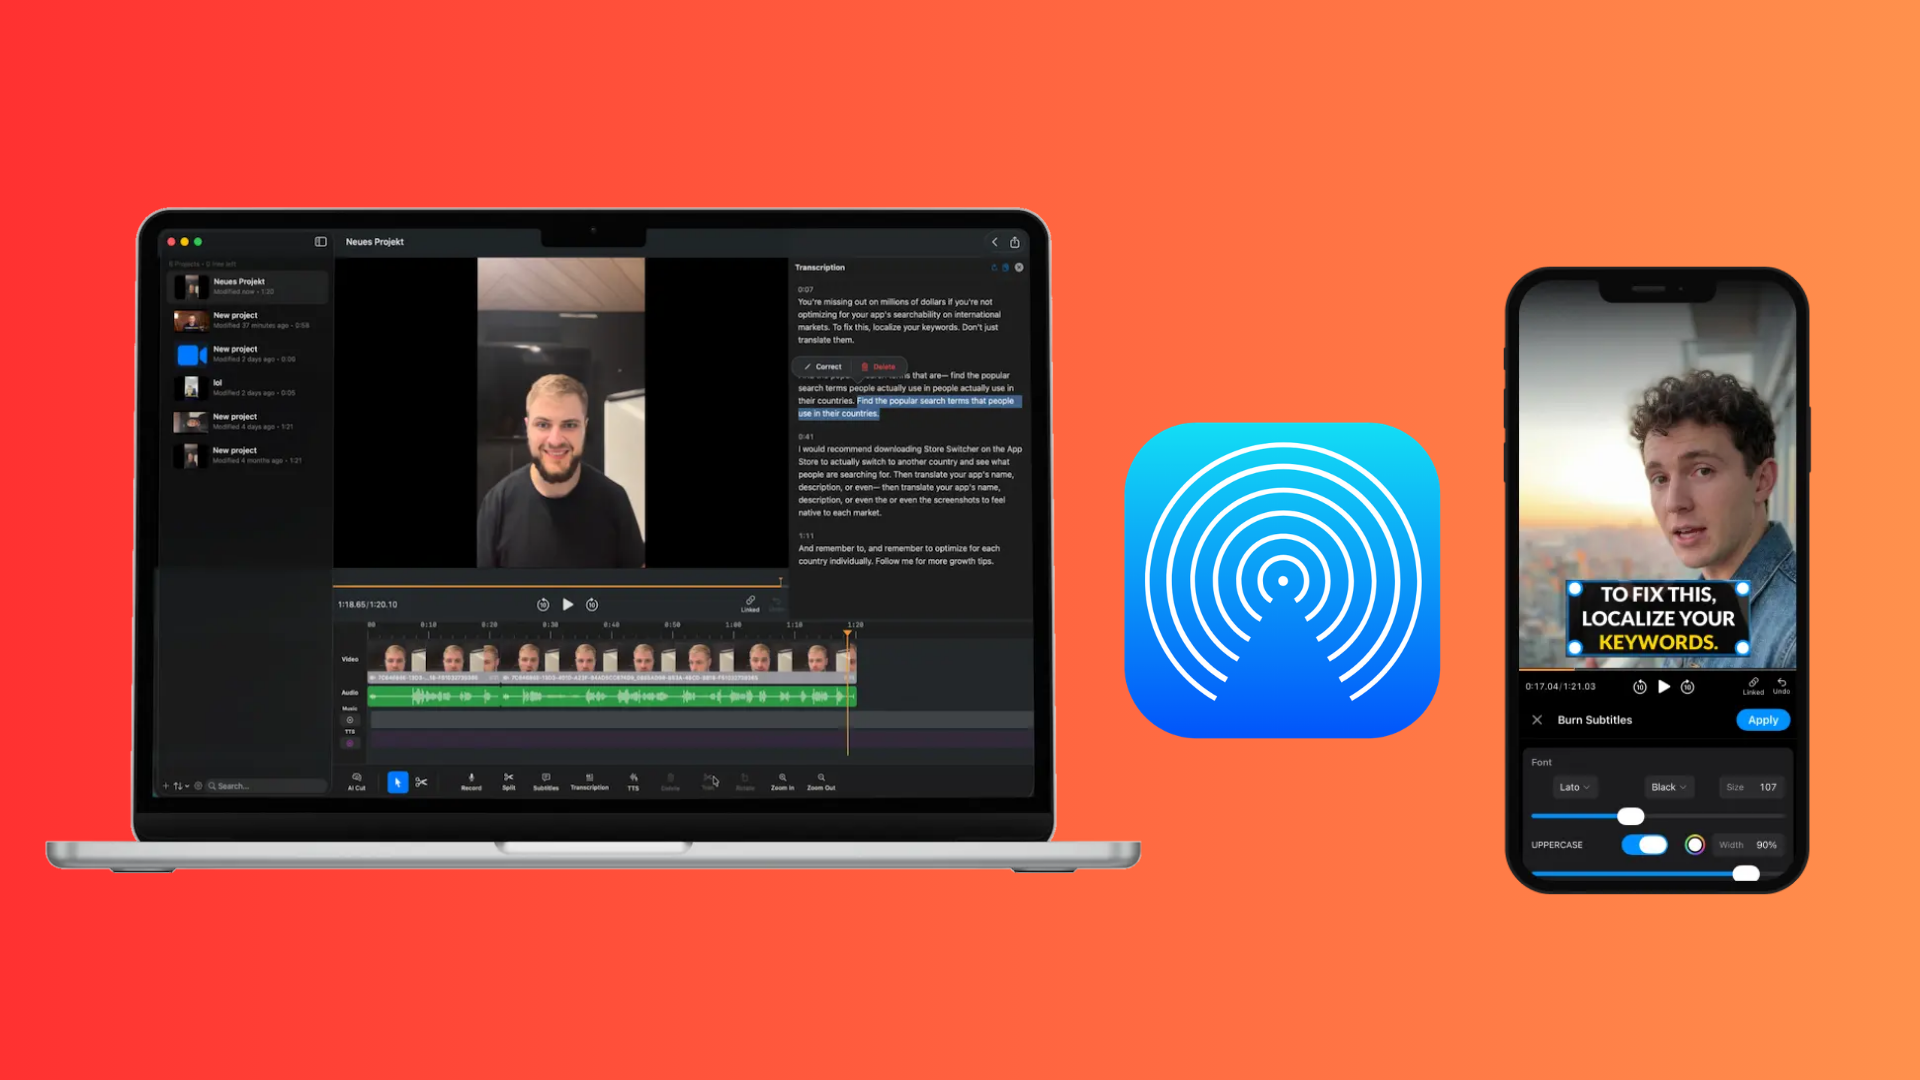
BlitzCut is a native Mac (and iPhone) app that automates the most time-consuming parts of talking head editing: silence removal, filler word cleanup, and caption generation. After importing a video, silence removal starts automatically — no upload, no waiting for a cloud server. The transcript is ready in 1–2 minutes.
From there, editing works like a text document: select filler words in the transcript, delete them, the video cuts happen automatically. Add captions in one tap.
At under $6/month billed annually, BlitzCut is one of the more affordable purpose-built tools in this category. It's not a full-featured timeline editor — it doesn't do color grading or complex multi-camera sync. But for the specific job of turning a raw talking head recording into a clean, captioned, export-ready clip, it's one of the fastest workflows available on Mac.
Use BlitzCut when: You're making talking head content more than once a week and spending too long on editing.
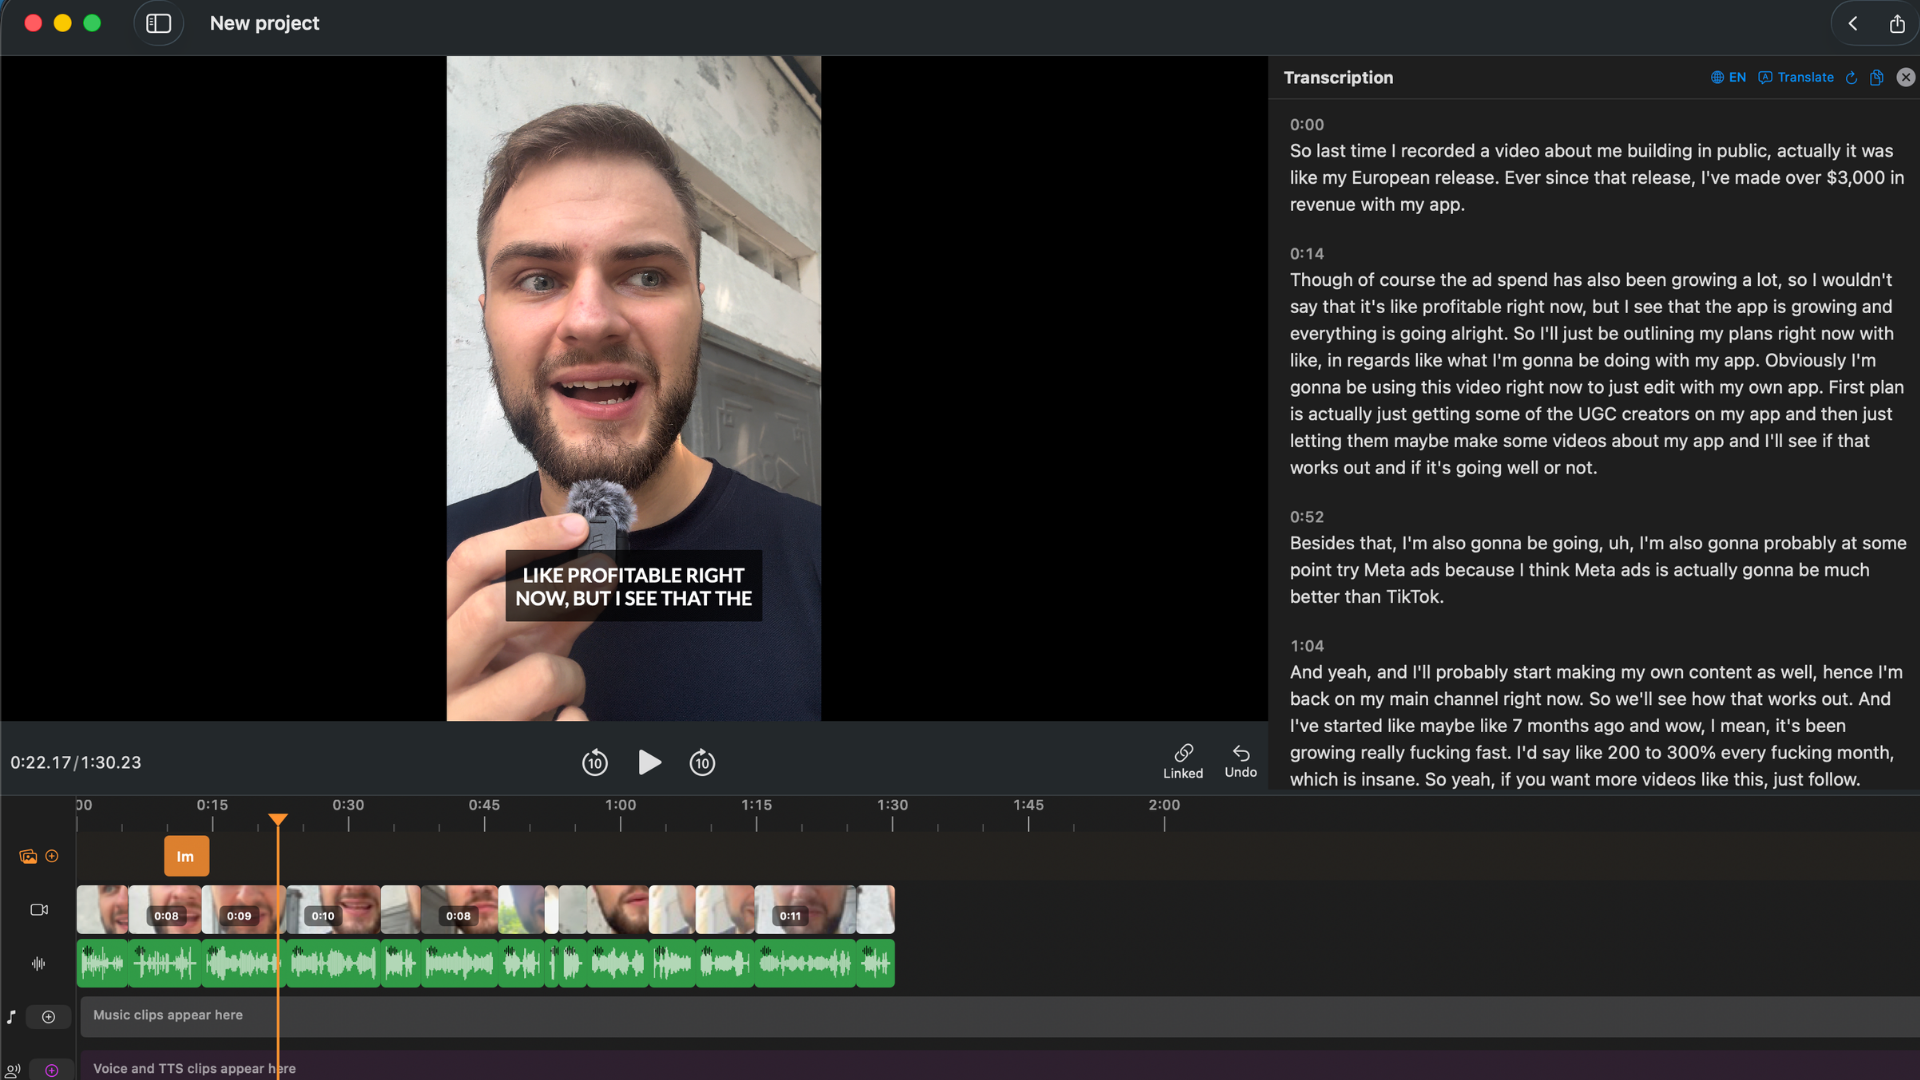
BlitzCut's transcript panel. After importing, the silence is already removed and every word is visible as editable text.
3. CapCut for Mac — Best Free Tool for Social Content
Best for: Beginners creating TikToks, Reels, and Shorts. Strong AI features, free tier is genuinely useful.
CapCut has a desktop Mac version that's more capable than most people expect from a free mobile app. It has auto-captions, trending templates, background removal, reframe for vertical export, and a solid timeline editor.
The free tier includes the core AI features. The Pro plan adds higher export quality and removes watermarks.
Use CapCut when: You're creating primarily for social platforms on a zero or near-zero budget.
4. DaVinci Resolve — Best Free Professional Editor
Best for: Beginners who want professional-grade tools and are willing to invest learning time
DaVinci Resolve is free, and the free version isn't limited in any meaningful way for most editing work. It includes professional color grading, the Fairlight audio editor, and a timeline that rivals Adobe Premiere.
The learning curve is steeper than iMovie or CapCut. There are a lot of panels and menus. But for someone who wants to grow into professional video editing without paying for software, it's the best starting point.
Use DaVinci Resolve when: You want to learn proper video editing, you need serious color work, or your content has multiple audio sources.
5. Final Cut Pro — Best for Mac Users Editing Regularly
Best for: Creators who edit weekly and want a fast, polished Mac-native experience
Final Cut Pro costs $299 once — no subscription. For a creator who edits regularly, the economics are better than Adobe Premiere ($22.99/month) after 14 months. It's fully native on Apple Silicon, uses the full Mac hardware (Neural Engine, GPU), and the magnetic timeline is genuinely faster to work with than traditional track-based editors.
No silence removal or AI captions built in (though plugins add them). For a beginner just starting out, the $299 investment is hard to justify before you know you'll stick with video editing. Start with iMovie, and move to Final Cut Pro when the tool is the bottleneck.
Use Final Cut Pro when: You've outgrown iMovie, you're on Mac, and you edit at least weekly.
The Beginner Workflow: Step by Step
This is the order of operations. Do things in the wrong order and you'll redo work.
Stage 1: Get Your Footage onto Your Mac
From iPhone: Connect via USB — your iPhone shows up in the Finder as a device and you can drag files directly. Or use AirDrop for smaller files. iCloud Photos with "Download Originals" enabled syncs footage automatically.
From camera: Connect via USB-C or use an SD card reader. Most Macs except the MacBook Pro 14" and 16" don't have a built-in SD slot — you'll need an adapter.
From recordings: Zoom, Riverside, Loom, and similar tools export MP4 files. Download directly to a project folder.
Folder structure (keep it simple):
Videos/
  ProjectName/
    raw/        ← never edit original files
    exports/    ← finished videos go here
    assets/     ← music, b-roll, logos
Always keep your raw files untouched. If something goes wrong in editing, you have the original to start over from.
AirDrop is the fastest way to move video files from iPhone to Mac for shorter clips. For larger files, USB connection is faster and more reliable.
Stage 2: The Rough Cut
The rough cut removes everything that shouldn't be in the final video: dead air, bad takes, filler words, the first 30 seconds of throat-clearing before you got into it.
This is the most important stage. Everything else is built on top of it.
In iMovie:
- Drag clips into the timeline
- Use the Cmd+B shortcut to split clips
- Select the bad segments and press Delete
- Gaps close automatically
In BlitzCut:
- Import video
- Silence removal runs automatically — dead air is gone before you do anything
- Review the transcript, select filler words, delete
- Done in a fraction of the time
In DaVinci Resolve or Final Cut:
- Import to the media pool
- Rough cut on the timeline using the blade tool
- Extend clips at cut points to fine-tune
For talking head content, BlitzCut's approach (transcript-based editing) is significantly faster than timeline scrubbing. For b-roll-heavy content or multi-camera work, Final Cut and DaVinci handle the complexity better.
Stage 3: Add Captions
85% of social video is watched with sound off. Captions are not optional if you're posting to TikTok, Reels, YouTube Shorts, or LinkedIn.
Auto-caption tools for Mac:
- BlitzCut — generates from the same transcript used for editing. One tap, styled options including animated word-by-word.
- CapCut — strong auto-captions, wide style library, free.
- Descript — highly accurate, deeply editable, $24/month.
- VEED — web-based, good accuracy, strong style options.
For iMovie: iMovie has no built-in auto-captions. You can add text overlays manually, but it's slow and the results look basic. If you're on iMovie and need captions, import the edited video into CapCut or BlitzCut just for caption generation.
Stage 4: Polish (Optional for Beginners)
Once the rough cut and captions are done, optional polish includes:
- B-roll coverage — screen recordings, stock footage, or supplementary clips over your talking head footage
- Background music — keep it low (10–15% of dialogue volume), use royalty-free tracks
- Color correction — adjust exposure, white balance if lighting was inconsistent
- Intro/outro — opening title card and closing call-to-action
As a beginner, skip these until your rough cut workflow is fast. The biggest gains come from cleaning the edit — not from adding elements on top.
Stage 5: Export
For social platforms: H.264 MP4 is the right format everywhere. Use these settings:
| Platform | Resolution | Aspect Ratio | Notes |
|---|---|---|---|
| YouTube (standard) | 1080p or 4K | 16:9 | H.264 or H.265 |
| YouTube Shorts | 1080×1920 | 9:16 | H.264 MP4 |
| TikTok | 1080×1920 | 9:16 | H.264 MP4 |
| Instagram Reels | 1080×1920 | 9:16 | H.264 MP4 |
| 1080p | 16:9 | H.264 MP4 |
In iMovie: File → Share → File. Choose 1080p or 4K. Format: Video and Audio. MP4.
In BlitzCut: Tap Export, choose aspect ratio (16:9 or 9:16), BlitzCut handles the rest.
In DaVinci Resolve: Deliver tab → Format: MP4, Video codec: H.264, Resolution: 1920x1080.
The 6 Most Common Beginner Mistakes on Mac
1. Music Too Loud
Background music should be barely audible — roughly 10–15% of dialogue volume. Beginners regularly set it at 50%+ and the dialogue becomes hard to follow.
2. Keeping Clips Too Long
Slow pacing is the primary reason viewers stop watching. Cut any section that isn't actively delivering value. If in doubt, cut it.
3. Transitions Everywhere
Dissolves, wipes, and spin transitions between every clip signal amateur editing. Use straight cuts for 90% of transitions. Dissolves for time passing. That's it.
4. Wrong Export Resolution
Exporting at 720p for a platform that shows 1080p makes your video look soft next to other content. Always export at 1080p minimum.
5. Not Watching Back Before Exporting
Play the full video before export. You'll catch audio gaps, sync errors, and caption mistakes in 3 minutes that would otherwise be live for your audience.
6. Skipping Captions
An uncaptioned video loses the portion of viewers watching on mute. Auto-captions take 90 seconds to generate. Add them.
Beginner Workflow Decision Guide
"I've never edited video and I just want to try it" → Open iMovie. It's already on your Mac. Drag your clip in, trim it, export.
"I make talking head content and editing takes me too long" → Try BlitzCut. Silence removal and filler word editing are automated, under $6/month billed annually.
"I'm making TikToks and Reels and want free tools" → CapCut for Mac. Free, AI captions, templates, vertical export built in.
"I want to learn proper video editing and don't mind a learning curve" → DaVinci Resolve. Free, professional, steep learning curve.
"I edit weekly and need a tool I won't outgrow" → Final Cut Pro. $299 once, fully native on Mac, the fastest editor on Apple Silicon.
Frequently Asked Questions
Is a Mac good for video editing as a beginner?
Yes. Apple Silicon Macs (M1 or newer) are excellent for video editing at every level. Even the base MacBook Air M1 handles 1080p editing smoothly and exports faster than most Windows PCs at the same price point. Apple's iMovie is also the best free beginner editor available — it's genuinely good, not just serviceable.
Do I need Final Cut Pro or can I use iMovie?
iMovie is enough to start. Most beginners should use iMovie until they hit a specific wall — a feature iMovie doesn't have that they genuinely need. Common walls: no silence removal, no AI captions, limited color tools. When you hit one of those walls, switch to the tool that solves it.
What's the difference between iMovie and Final Cut Pro for beginners?
iMovie has a simpler interface, fewer features, and is free. Final Cut Pro has a magnetic timeline (faster to work with), supports more formats, has advanced audio and color tools, and costs $299 once. Both run on Mac. Start with iMovie — Final Cut Pro will be there when you need it.
Can I edit 4K video on a MacBook Air?
Yes. MacBook Air M1 and newer handles 4K editing without significant issues. You may need to use proxy files (lower-resolution stand-ins) on an 8GB M1 Air for 4K workflows with many clips, but for single-camera 4K talking head content it's smooth.
What format should I export for YouTube?
H.264 MP4 at 1080p for standard videos. YouTube recommends uploading at the highest quality you recorded — the platform compresses on its end. For Shorts, export at 1080×1920 (9:16 vertical) H.264 MP4.
Is CapCut free on Mac?
Yes. CapCut has a free Mac desktop version with the core editing tools, AI captions, templates, and export features. The Pro plan adds higher export quality, additional AI features, and removes the watermark from some exports.
Does video editing slow down my Mac?
Rendering and exporting large videos uses significant CPU and GPU resources and will make the fan spin up. During regular editing (cutting, trimming, reviewing), most modern Macs handle it without noticeable slowdown. Close other heavy apps (Chrome tabs, Slack) during long exports.
Related: How to Edit Talking Head Videos Fast · Video Editing Workflow for Beginners on Mac · Best Mac Apps for Silence Removal in 2026
Post every day without spending hours editing
BlitzCut is a native App Store app for iPhone, iPad and on Mac. Get from raw footage to TikTok-ready in under 2 minutes, so editing is never the reason you didn't post.
Download BlitzCut on the App StoreRelated Articles
Keep Reading

Best Podcast Clip Makers in 2026 (Honest Comparison)
The best podcast clip makers compared: Opus Clip, Vizard, Riverside, Descript, and BlitzCut — ranked by how you actually clip, with real tradeoffs and pricing.

Best Teleprompter Apps for iPhone in 2026 (Tested)
The best teleprompter apps for iPhone: Teleprompter Premium, PromptSmart Pro, BIGVU, and free options compared — plus the editing step that makes prompter footage watchable.

How to Edit a VSL That Converts (2026 Guide)
How to edit a video sales letter: cut dead air, tighten the script after recording, add captions for muted autoplay, and pace the pitch — with the exact workflow.