How to Export Vertical Video on Mac (9:16 for TikTok, Reels, Shorts)
Export vertical 9:16 video on Mac for TikTok, Reels, and Shorts in 2026. BlitzCut, iMovie, and Final Cut Pro — settings, formats, and common mistakes.

To export vertical video (9:16) on Mac, you need to either record vertically on your phone and export without cropping, or reframe horizontal footage into a 9:16 canvas in your editing app. BlitzCut exports vertical 9:16 directly on Mac in one tap. iMovie requires a vertical crop workaround. Final Cut Pro supports custom aspect ratios in sequence settings.
Most Mac video editing apps are built for horizontal (16:9) video — the traditional widescreen format. But in 2026, over 60% of short-form video content is consumed vertically on TikTok, Instagram Reels, and YouTube Shorts. Getting vertical export right on Mac requires knowing which tools support it natively and which require workarounds.
This guide covers every approach: recording vertical from the start, reframing horizontal footage, and exporting correctly for each platform.
Vertical Video Specs by Platform (2026)
Before exporting, know the spec for each platform:
| Platform | Aspect Ratio | Resolution | Max Duration | File Size |
|---|---|---|---|---|
| TikTok | 9:16 | 1080×1920 | 10 minutes | 287.6 MB |
| Instagram Reels | 9:16 | 1080×1920 | 90 seconds | 4 GB |
| YouTube Shorts | 9:16 | 1080×1920 | 60 seconds | — |
| Snapchat | 9:16 | 1080×1920 | 3 minutes | — |
| Pinterest Video | 9:16 or 2:3 | 1080×1920 | 15 minutes | 2 GB |
| LinkedIn (mobile) | 9:16 | 1080×1920 | 10 minutes | 5 GB |
All major short-form platforms use 1080×1920 (9:16) as their standard vertical resolution. When in doubt, target 1080×1920 at 30fps in MP4 (H.264) format.
Approach 1: Record Vertically (Easiest)
The easiest way to export vertical video on Mac is to not need conversion in the first place.
If you record on an iPhone held vertically, the footage is natively 9:16. Import it to your Mac and export without reframing.
For iPhone recording:
- Hold phone vertically before pressing record
- In the Camera app, your footage captures at 1080×1920 or 4K×2160 in 9:16
- Import to Mac via AirDrop or USB
- Edit and export — no reframing needed
Tip: Record at 4K vertical (2160×3840) if your iPhone supports it. This gives you room to zoom and reframe in editing without losing quality, while still exporting at 1080×1920.
Approach 2: Reframe Horizontal to Vertical
If you recorded horizontally (16:9) on a camera or screen recorder, you need to reframe the footage for vertical platforms.
There are two ways to reframe:
Option A: Crop to Center (Quick)
The simplest approach: crop your horizontal frame to show only the center portion at 9:16. If the speaker is centered in frame, this works well. You lose the left and right edges but keep the subject.
This is called a center crop or pillar crop.
Option B: Pan and Scan (Better)
Pan and scan follows the subject through the frame. If your speaker moves or gestures, you can keyframe the crop position so the framing tracks with them. This produces better results but takes more time.
For single-person talking-head content (most podcast and tutorial clips), center crop is sufficient — the speaker doesn't typically leave center frame.
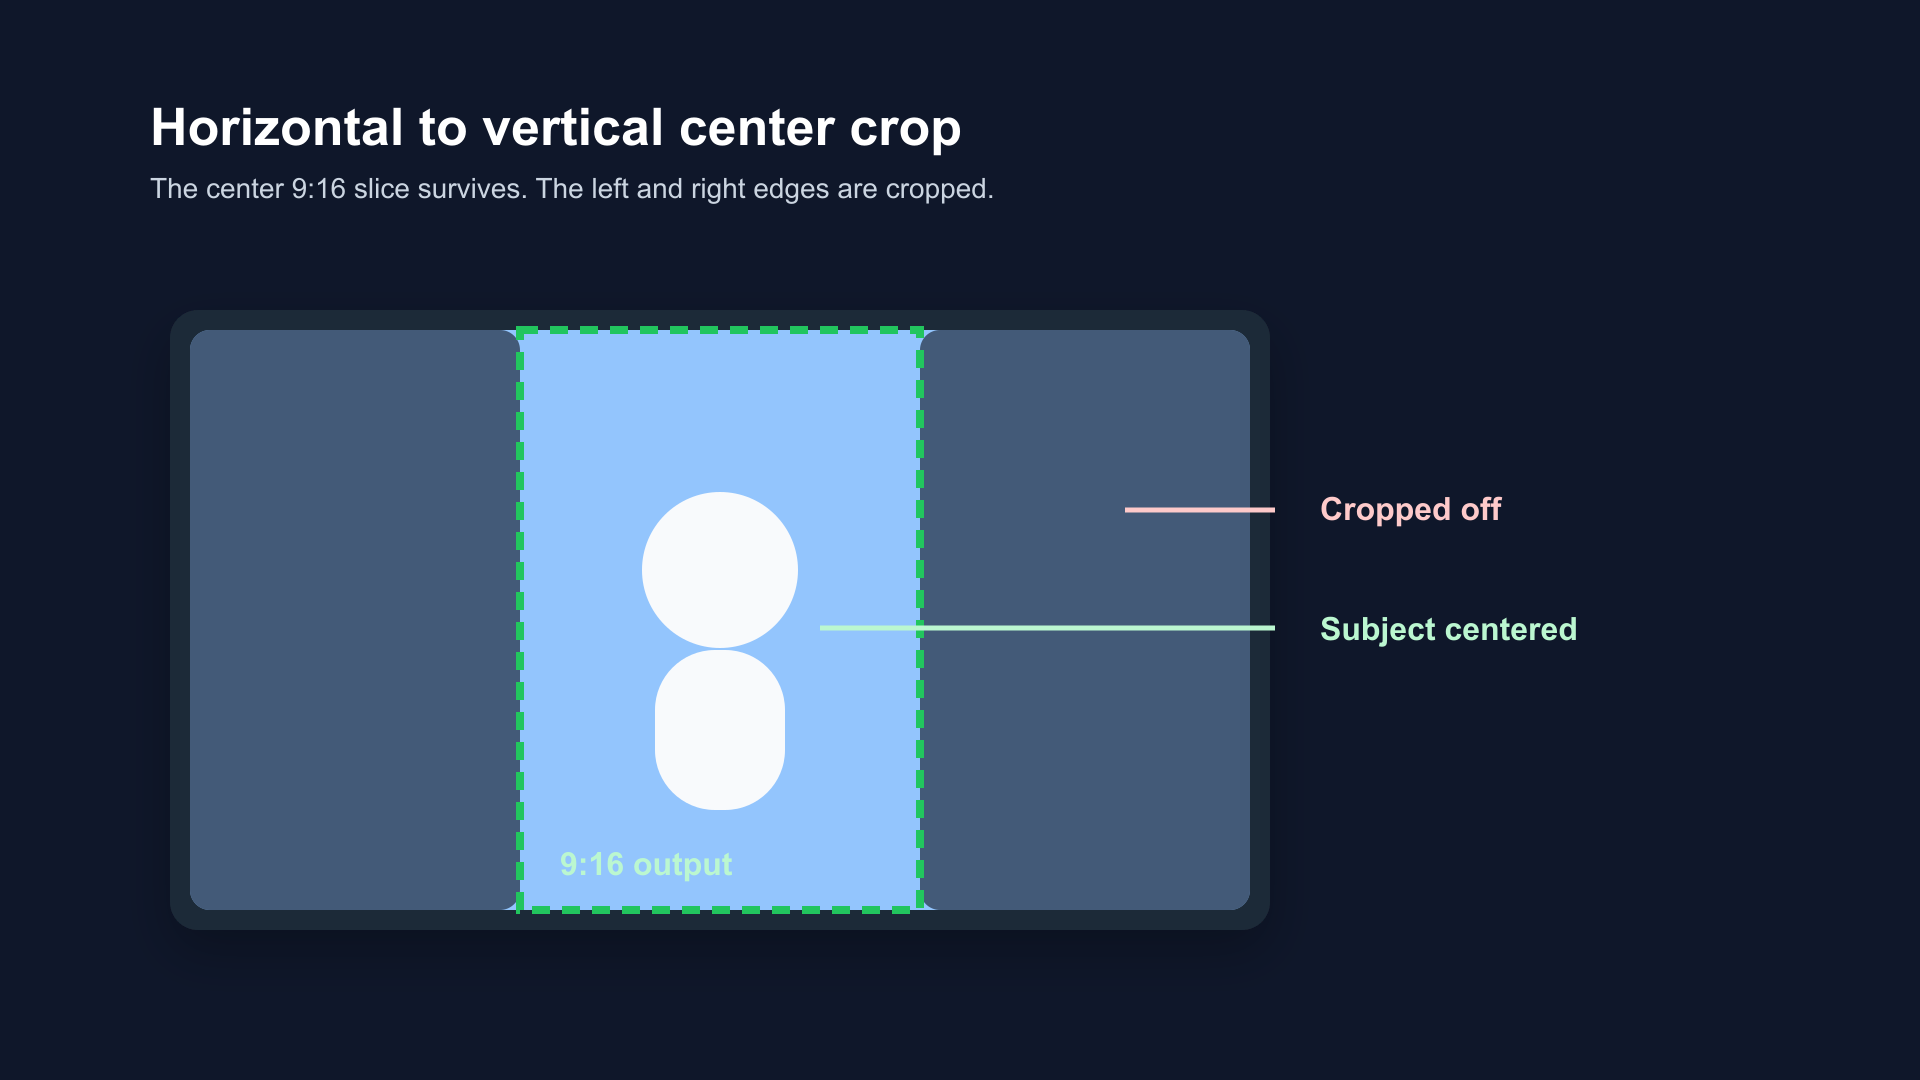
Center crop: the 16:9 frame is narrowed to the center 9:16 slice. Left and right edges are cut — works well when the subject is centered, loses context on wider shots.
How to Export Vertical Video in BlitzCut (Mac)
BlitzCut is a native Mac App Store app with built-in vertical export.
Step 1: Import your video (horizontal or vertical)
Step 2: Edit as needed (silence removal, filler words, captions)
Step 3: Before exporting, select Vertical (9:16) as your export format
Step 4: BlitzCut applies a center crop and exports at 1080×1920
If your footage was recorded vertically, BlitzCut exports it at native vertical resolution. If it was horizontal, BlitzCut applies a center crop.
BlitzCut also includes an AI reframe feature that detects the primary speaker and automatically positions the crop to keep them in frame — useful for footage where the speaker isn't perfectly centered.
This is the fastest vertical export workflow on Mac: no timeline configuration, no custom sequence settings, one tap.
Download BlitzCut from the App Store
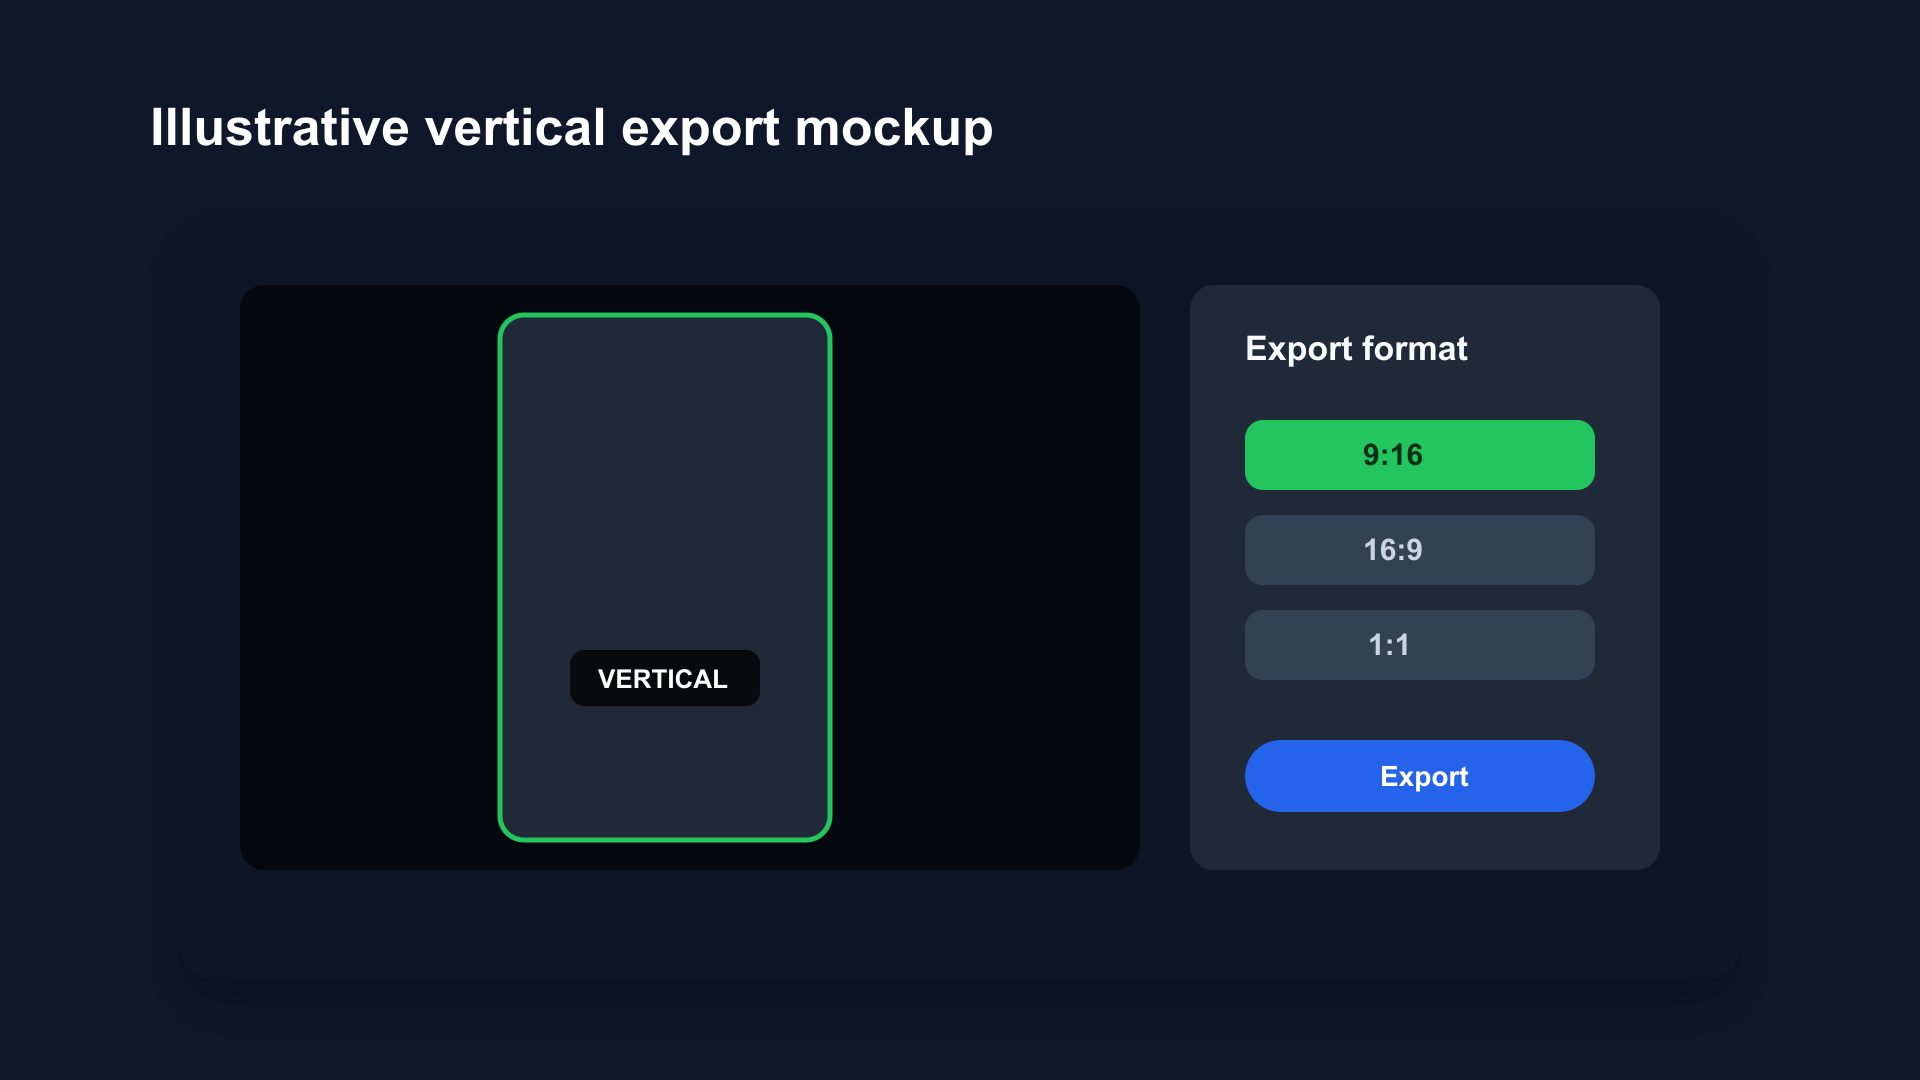
Illustrative BlitzCut export mockup with vertical 9:16 selected. For horizontal footage, the center crop is applied automatically. For natively vertical footage, it exports at original resolution. One tap, no sequence setup required.
How to Export Vertical Video in iMovie (Mac)
iMovie does not natively support vertical aspect ratios. Every iMovie project uses a 16:9 canvas. But there is a workaround.
The iMovie Vertical Export Workaround
iMovie defaults to 16:9 for all projects. When you import vertically-shot iPhone footage, iMovie may rotate or crop it to fit the landscape canvas. The workaround:
Method 1: Rotate Horizontal to Simulate Vertical
- Create a new iMovie project (16:9 canvas)
- Import your footage
- Select the clip and click Crop → Rotate to correct orientation
- Export at your desired resolution
This allows correctly-oriented vertical footage to export, but the output file resolution depends on how iMovie handles the canvas.
Method 2: Crop to Vertical Frame
- Import footage to the 16:9 timeline
- In the viewer, click Crop
- Adjust the crop box to a tall, narrow selection
- Export
The fundamental limitation: iMovie's project canvas is fixed at 16:9. Whether the exported file is truly 1080×1920 or 1920×1080 with letterboxing depends on the source footage and how iMovie handles it. Multiple sources, including Alphr's iMovie guide, note that iMovie "automatically crops your vertical video to fit the 16:9 ratio" and that users must rotate footage to achieve proper orientation. For guaranteed 1080×1920 output, use BlitzCut or Final Cut Pro — both support custom aspect ratios explicitly.
For proper vertical export on Mac, use BlitzCut or Final Cut Pro.
How to Export Vertical Video in Final Cut Pro (Mac)
Final Cut Pro supports custom aspect ratios, including 9:16. This is the correct way to create true vertical video on Mac for professional use.
Setting Up a Vertical Project in Final Cut Pro
Step 1: Create a Custom Library/Project
- Open Final Cut Pro
- Go to File → New → Project
- In the Project settings, click Custom for Video Properties
- Set Resolution to 1080 × 1920
- Set Rate to 29.97fps (or 30fps)
- Click OK
This creates a true 9:16 vertical sequence.
Step 2: Import Your Footage
Import your video normally. If it's horizontal 16:9, it will show black bars on top and bottom in the vertical canvas (pillarboxing).
Step 3: Reframe Horizontal Footage
To fill the 9:16 frame with horizontal footage:
- Select the clip in the timeline
- In the Video Inspector, click Transform (or press Shift+T)
- Scale up the clip until it fills the vertical frame (scale to ~180% typically)
- Adjust position to keep the subject centered
- For multiple clips, apply consistently
Alternatively, use Spatial Conform set to Fill — this auto-scales each clip to fill the canvas.
Step 4: Export
- File → Share → Master File
- Choose H.264 format
- The output will be 1080×1920 at your specified frame rate
Final Cut's Compressor integration gives you fine-grained control over bitrate and codec — use H.264 for compatibility, H.265 (HEVC) for smaller files at equivalent quality.
How to Export Vertical Video in CapCut for Mac
CapCut's Mac desktop app has strong vertical support.
- Create a new project and set ratio to 9:16 from the ratio selector at the start
- Import footage — CapCut auto-crops horizontal footage to fill the 9:16 canvas
- Edit as needed
- Export — CapCut exports at 1080×1920 natively
CapCut is free and handles vertical export well. The main limitation is that the Mac desktop app is less polished than the mobile version, and some features require a Pro subscription.
Common Mistakes When Exporting Vertical Video on Mac
Mistake 1: Exporting 16:9 With Black Bars
The result: your video appears letterboxed (small horizontal video in the middle of a vertical screen) on TikTok. Platforms don't automatically crop — they display what you give them.
Fix: Use BlitzCut or a properly configured Final Cut Pro project for true 9:16 export.
Mistake 2: Wrong Resolution (Upscaling Low-Resolution Footage)
If you shot at 720p (1280×720) and try to export to 1080×1920, you're upscaling — the video will look soft and pixelated.
Fix: Match your export resolution to your recording resolution. For 720p footage, export at 720×1280 (9:16 at 720p quality). Most platforms accept this.
Mistake 3: Incorrect Frame Rate
TikTok and Reels both prefer 30fps. Exporting at 24fps can cause subtle playback issues, particularly with on-screen text that appears to stutter.
Fix: Export at 30fps unless you have a specific reason for 24fps.
Mistake 4: Cropping Off Captions
If you added captions for horizontal viewing and then reframe to vertical, caption text may get cropped at the edges.
Fix: When adding captions to footage that will be exported vertically, position captions in the lower-center portion of the frame (not at the edges). In BlitzCut, captions are automatically positioned for vertical export.
Mistake 5: Exporting in MOV When Platform Prefers MP4
Some Mac export defaults produce MOV files. While most platforms accept MOV, MP4 (H.264) is more universally compatible and has slightly better compression.
Fix: Export as MP4 (H.264) for all social platforms.
Bitrate Recommendations for Vertical Video
File size matters for upload speed and mobile playback quality:
| Quality Level | Bitrate | File Size (60-sec clip) |
|---|---|---|
| High quality | 8–12 Mbps | ~75–90 MB |
| Standard | 4–6 Mbps | ~35–45 MB |
| Compressed (upload fast) | 2–3 Mbps | ~15–22 MB |
TikTok recommends a minimum of 5 Mbps for 1080p. Instagram Reels processes uploaded video aggressively — uploading at higher bitrate gives their compression more to work with, resulting in better final quality.
BlitzCut and Final Cut Pro default to reasonable bitrates. If you need fine control, use Final Cut's Compressor or HandBrake (free) for manual bitrate settings.
Frequently Asked Questions
Can iMovie export true vertical 9:16 video?
No. iMovie outputs all projects as 16:9. You can position footage to simulate vertical framing, but the exported file will be 1920×1080 with black bars. For true 1080×1920 vertical export on Mac, use BlitzCut or Final Cut Pro.
How do I turn a horizontal YouTube video into a vertical TikTok?
Import the horizontal video into BlitzCut on Mac, select Vertical (9:16) export, and BlitzCut applies a center crop. Alternatively, use Final Cut Pro with a custom 1080×1920 project and scale up the footage to fill the frame.
Does TikTok accept horizontal videos?
Yes, TikTok accepts horizontal video, but it will display in letterbox mode (vertical phone screen with black bars on top and bottom). For better engagement, vertical fills the screen and performs significantly better.
What's the difference between 9:16 and 4:5 aspect ratios?
9:16 (1080×1920) fills the entire phone screen and is used by TikTok, Reels, and YouTube Shorts. 4:5 (1080×1350) is Instagram feed format — slightly less tall. If you're creating for multiple platforms, export in 9:16 (fits Reels, TikTok, Shorts) as your primary format.
Does Apple Silicon help with vertical video export?
Yes. M-series Mac chips use hardware-accelerated H.264 and H.265 encoding. A 5-minute vertical export that takes 3 minutes on Intel takes under 30 seconds on M1 or later. This matters most when exporting multiple clips in bulk.
Vertical video is the default format for short-form content in 2026. Getting the export right on Mac requires a tool that actually supports 9:16 output — iMovie doesn't, but BlitzCut and Final Cut Pro do.
For the fastest vertical export workflow on Mac, BlitzCut handles the entire process — silence removal, captions, and 9:16 export — in one app.
Download BlitzCut from the App Store and export your first vertical clip in under 5 minutes.
Post every day without spending hours editing
BlitzCut is a native App Store app for iPhone, iPad and on Mac. Get from raw footage to TikTok-ready in under 2 minutes, so editing is never the reason you didn't post.
Download BlitzCut on the App StoreRelated Articles
Keep Reading

Best Podcast Clip Makers in 2026 (Honest Comparison)
The best podcast clip makers compared: Opus Clip, Vizard, Riverside, Descript, and BlitzCut — ranked by how you actually clip, with real tradeoffs and pricing.

Best Teleprompter Apps for iPhone in 2026 (Tested)
The best teleprompter apps for iPhone: Teleprompter Premium, PromptSmart Pro, BIGVU, and free options compared — plus the editing step that makes prompter footage watchable.

How to Edit a VSL That Converts (2026 Guide)
How to edit a video sales letter: cut dead air, tighten the script after recording, add captions for muted autoplay, and pace the pitch — with the exact workflow.