
How to Screen Record on Mac (With Audio)
How to screen record on Mac with the Screenshot toolbar or QuickTime, record your voice or system audio, stop the recording, and find where it's saved.


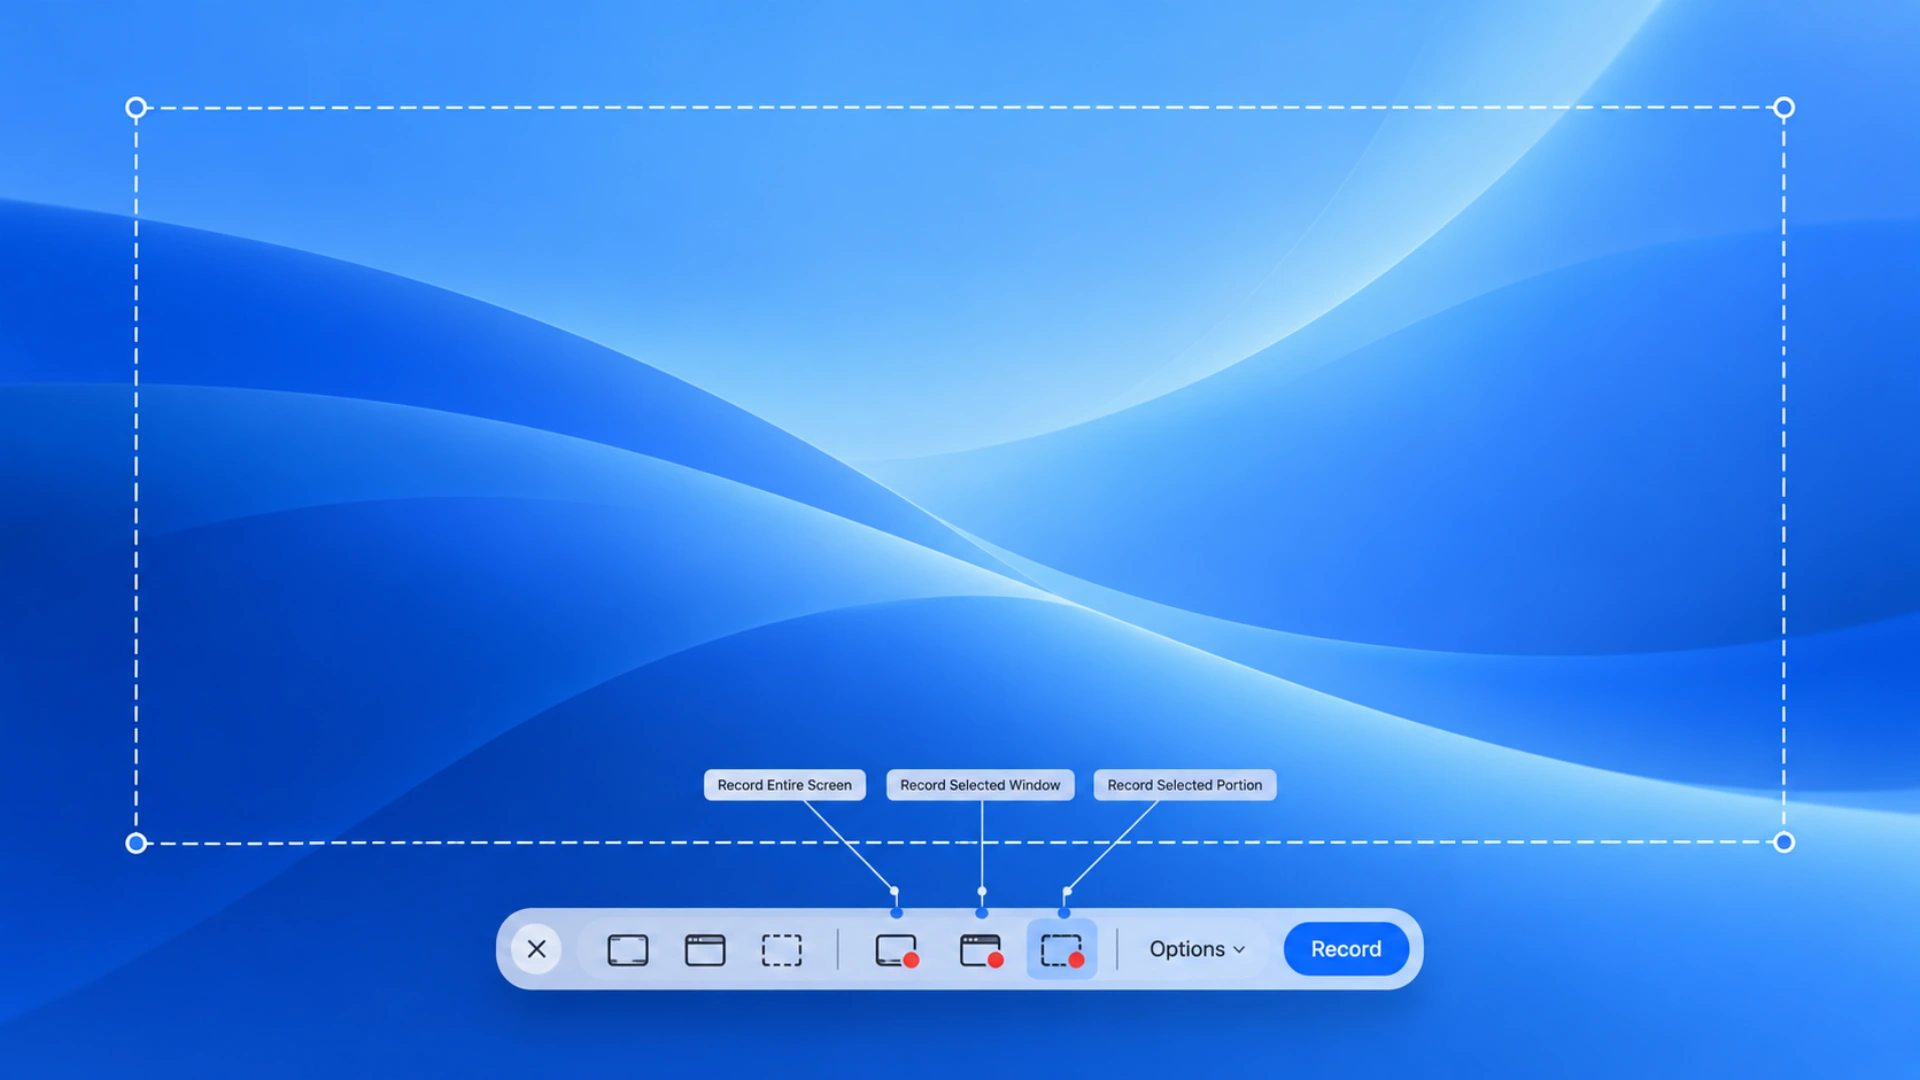
To screen record on Mac, press Shift-Command-5, choose Record Entire Screen, Record Selected Window, or Record Selected Portion, then click Record. To stop, click the Stop button in the menu bar or press Command-Control-Esc. The recording saves to your desktop as a .mov file.
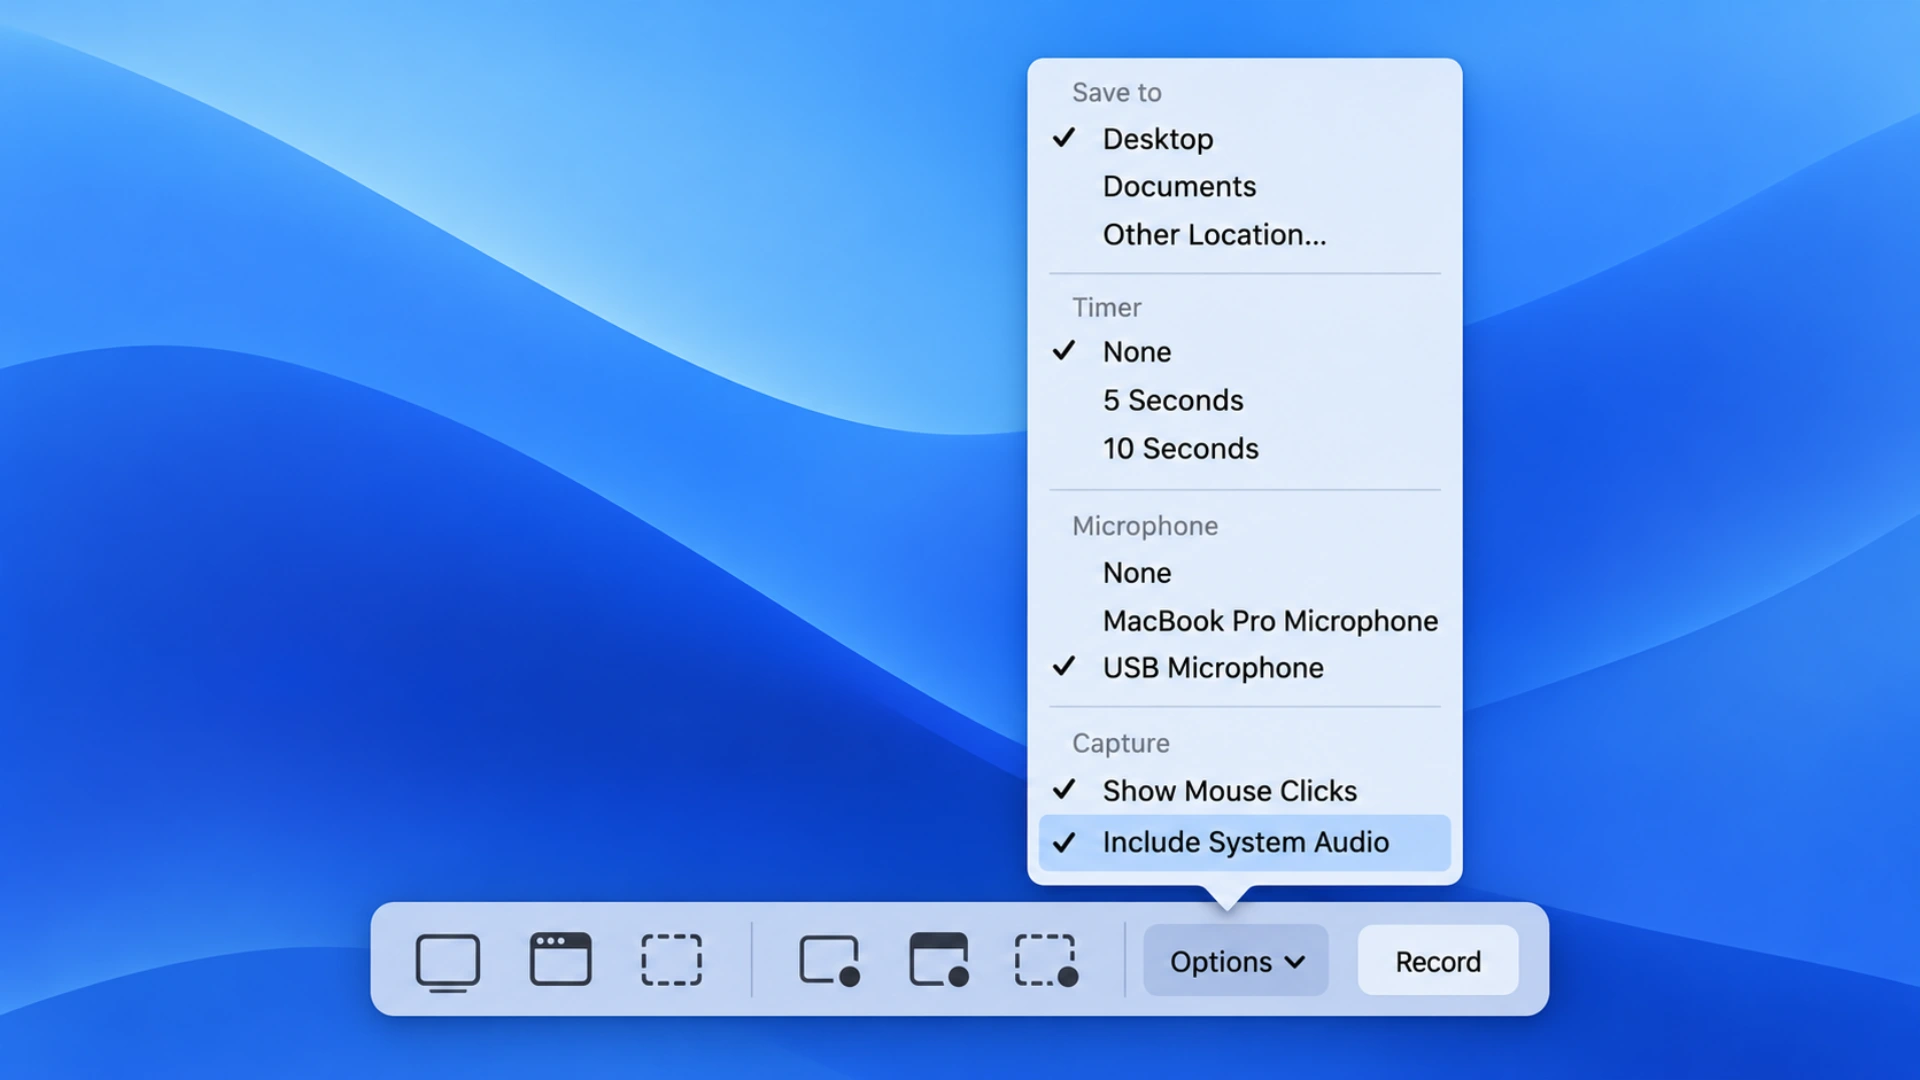
To record your voice, pick a microphone under Options before you start. To record the sound your Mac is playing, turn on Include System Audio in the same menu (macOS 27 Golden Gate or later).
How to screen record on Mac with the Screenshot toolbar
The Screenshot toolbar is built into macOS, so you don't need to install anything. From Apple's screen recording guide:
- Press Shift-Command-5 to open the toolbar.
- Choose what to record:
- Record Entire Screen records everything on one display.
- Record Selected Window records one app window (macOS Tahoe 26 or later).
- Record Selected Portion records an area you drag out. Drag the edges to resize it.
- Click Options to choose a microphone, turn on system audio, show mouse clicks, set a timer, or change where the file is saved.
- Click Record. If you chose a window, click the window you want.
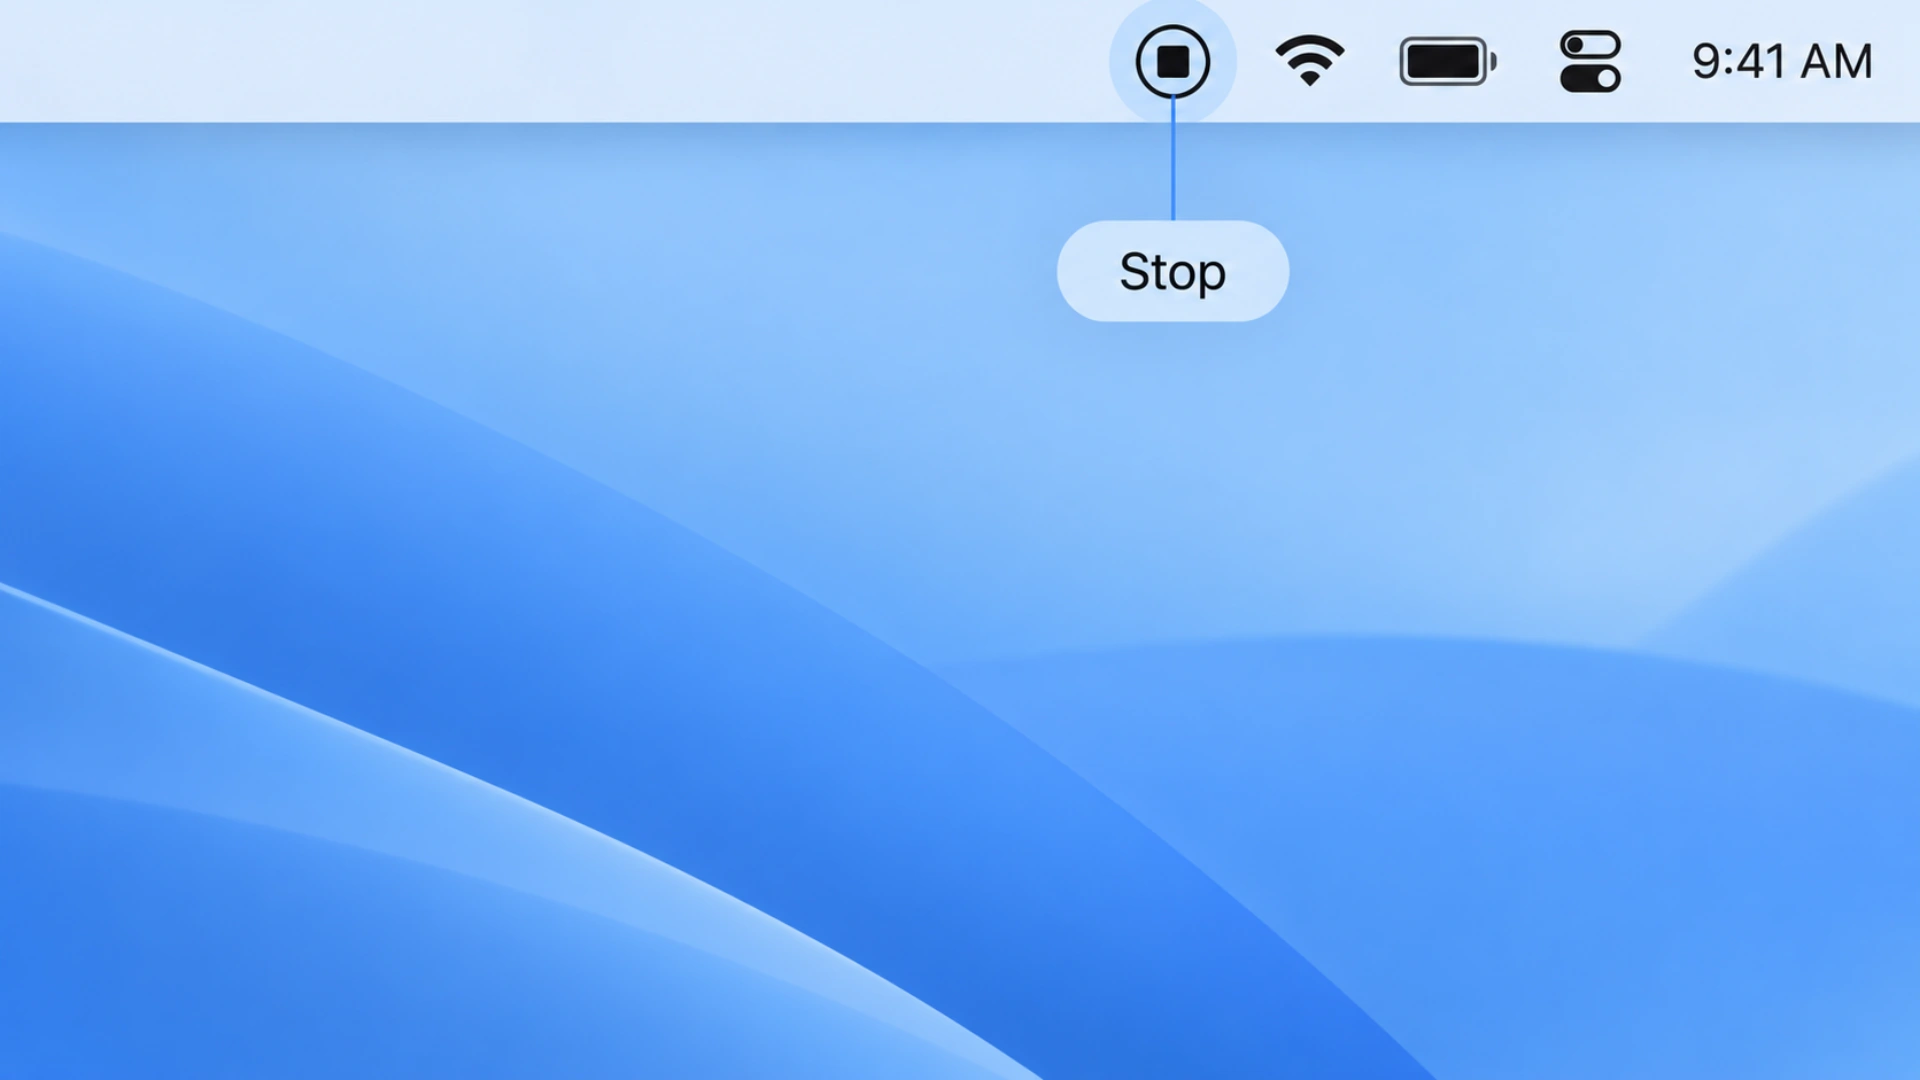
- When you're done, click the Stop button in the menu bar.
Press Esc before clicking Record if you change your mind.
How to screen record on Mac with audio
You can record two kinds of sound, and they're separate settings:
- Your voice (microphone): in the Screenshot toolbar, click Options and pick a microphone, such as the MacBook's built-in mic or a USB microphone. In QuickTime, click the arrow next to the Record button and pick a microphone.
- Your Mac's sound (system audio): the sound from a video, an app, or a call. In the Screenshot toolbar, click Options and turn on Include System Audio. This option needs macOS 27 Golden Gate or later, which came out in September 2026.
On macOS Tahoe 26 or earlier, the built-in tools record your microphone but not your Mac's own sound. To capture system audio there, you need either a free virtual audio driver such as BlackHole, routed through a Multi-Output Device in Audio MIDI Setup, or a screen recorder that captures system audio itself, such as OBS. Updating to macOS 27 is simpler if your Mac supports it (Macs with Apple silicon).
The first time an app records your screen or audio, macOS asks for permission. If a recording comes out silent or blank, check System Settings → Privacy & Security → Screen & System Audio Recording and make sure the app is allowed.
How to stop screen recording on Mac
There are two ways to stop screen recording on Mac, and both work whether you started from the Screenshot toolbar or QuickTime:
- Click the Stop button (a square in a circle) in the menu bar at the top of the screen.
- Press Command-Control-Esc.
If you can't see the Stop button because an app is in full screen, use the keyboard shortcut, or move your pointer to the top of the screen to show the menu bar.
How to screen record on Mac with QuickTime Player
QuickTime Player is the older way to record your screen, and it works the same on every recent Mac:
- Open QuickTime Player from your Applications folder.
- Choose File → New Screen Recording, or press Control-Command-N. On newer versions of macOS this opens the same Screenshot toolbar, so follow the steps above.
- If the QuickTime recording window appears instead, click the arrow next to Record to choose a microphone and whether to show mouse clicks.
- Click Record, then click anywhere to record the whole screen, or drag to select an area and click Start Recording.
- Stop it from the menu bar or with Command-Control-Esc. QuickTime opens the recording so you can watch, trim, or save it.
Where do screen recordings go on Mac?
Screen recordings save to your desktop by default, named "Screen Recording [date] at [time].mov". To change the location, open the Screenshot toolbar, click Options, and choose a folder under Save to, such as Documents or a folder you've made for recordings.
Recordings are .mov files. Most apps open them, but some upload forms and older Windows PCs prefer MP4. See how to convert MOV to MP4 if you need to.
How to record your screen and your face together
The Screenshot toolbar doesn't add a camera bubble. The built-in workaround is QuickTime:
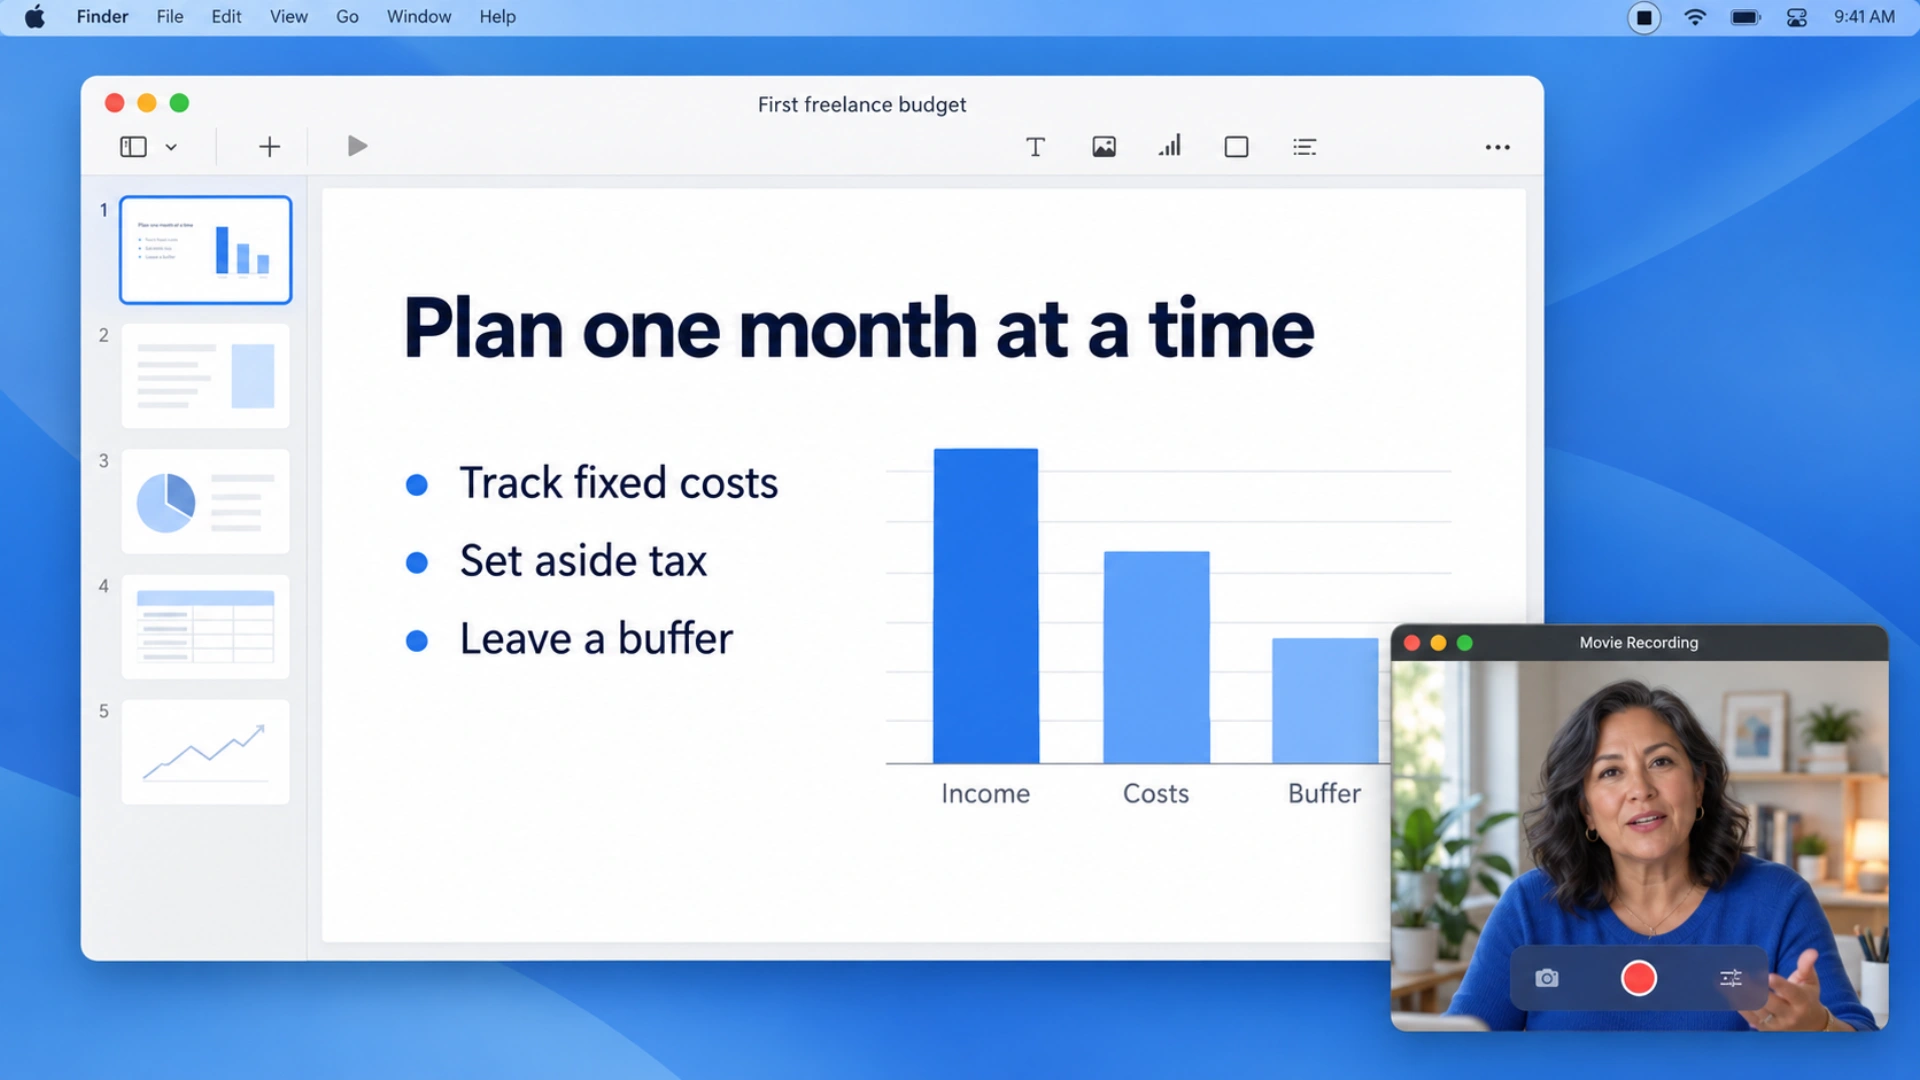
- In QuickTime Player, choose File → New Movie Recording so your camera appears in a window.
- Choose View → Float on Top so that window stays above everything else.
- Resize the camera window and drag it to a corner.
- Start a screen recording with Shift-Command-5, choosing Record Entire Screen or a Selected Portion that includes the camera window. Both windows must be inside the recorded area.
For better framing and lighting tips, see how to record a video on Mac.
Tips for a clean screen recording
- Turn on Do Not Disturb in Control Center so notifications don't pop up mid-recording.
- Close apps and tabs you don't need, and hide anything private, such as email or messages.
- Record a selected window or portion instead of the entire screen when you only need one app. The file is smaller and viewers can see more detail.
- Turn on Show Mouse Clicks for tutorials, so viewers can see where you click.
- Use the timer (5 or 10 seconds) to give yourself time to get ready.
- Test 10 seconds first, and play it back with sound before you record a long session.
- Use an external microphone if you're narrating. The built-in mic picks up keyboard noise and room echo. See our USB microphone picks for Mac.
Fix common screen recording problems
- No sound in the recording: check that a microphone was selected in Options. For your Mac's sound, check that Include System Audio was on (macOS 27 or later).
- The recording is black or a window is missing: some apps, such as the Apple TV app, block their windows from being recorded.
- Recording won't start, or the app isn't allowed: open System Settings → Privacy & Security → Screen & System Audio Recording and turn the app on.
- I can't find the file: check the desktop, or open the Screenshot toolbar and look at Options → Save to to see where it's saving.
Edit your screen recording
For a quick trim, open the recording in QuickTime Player and choose Edit → Trim, then drag the yellow handles.
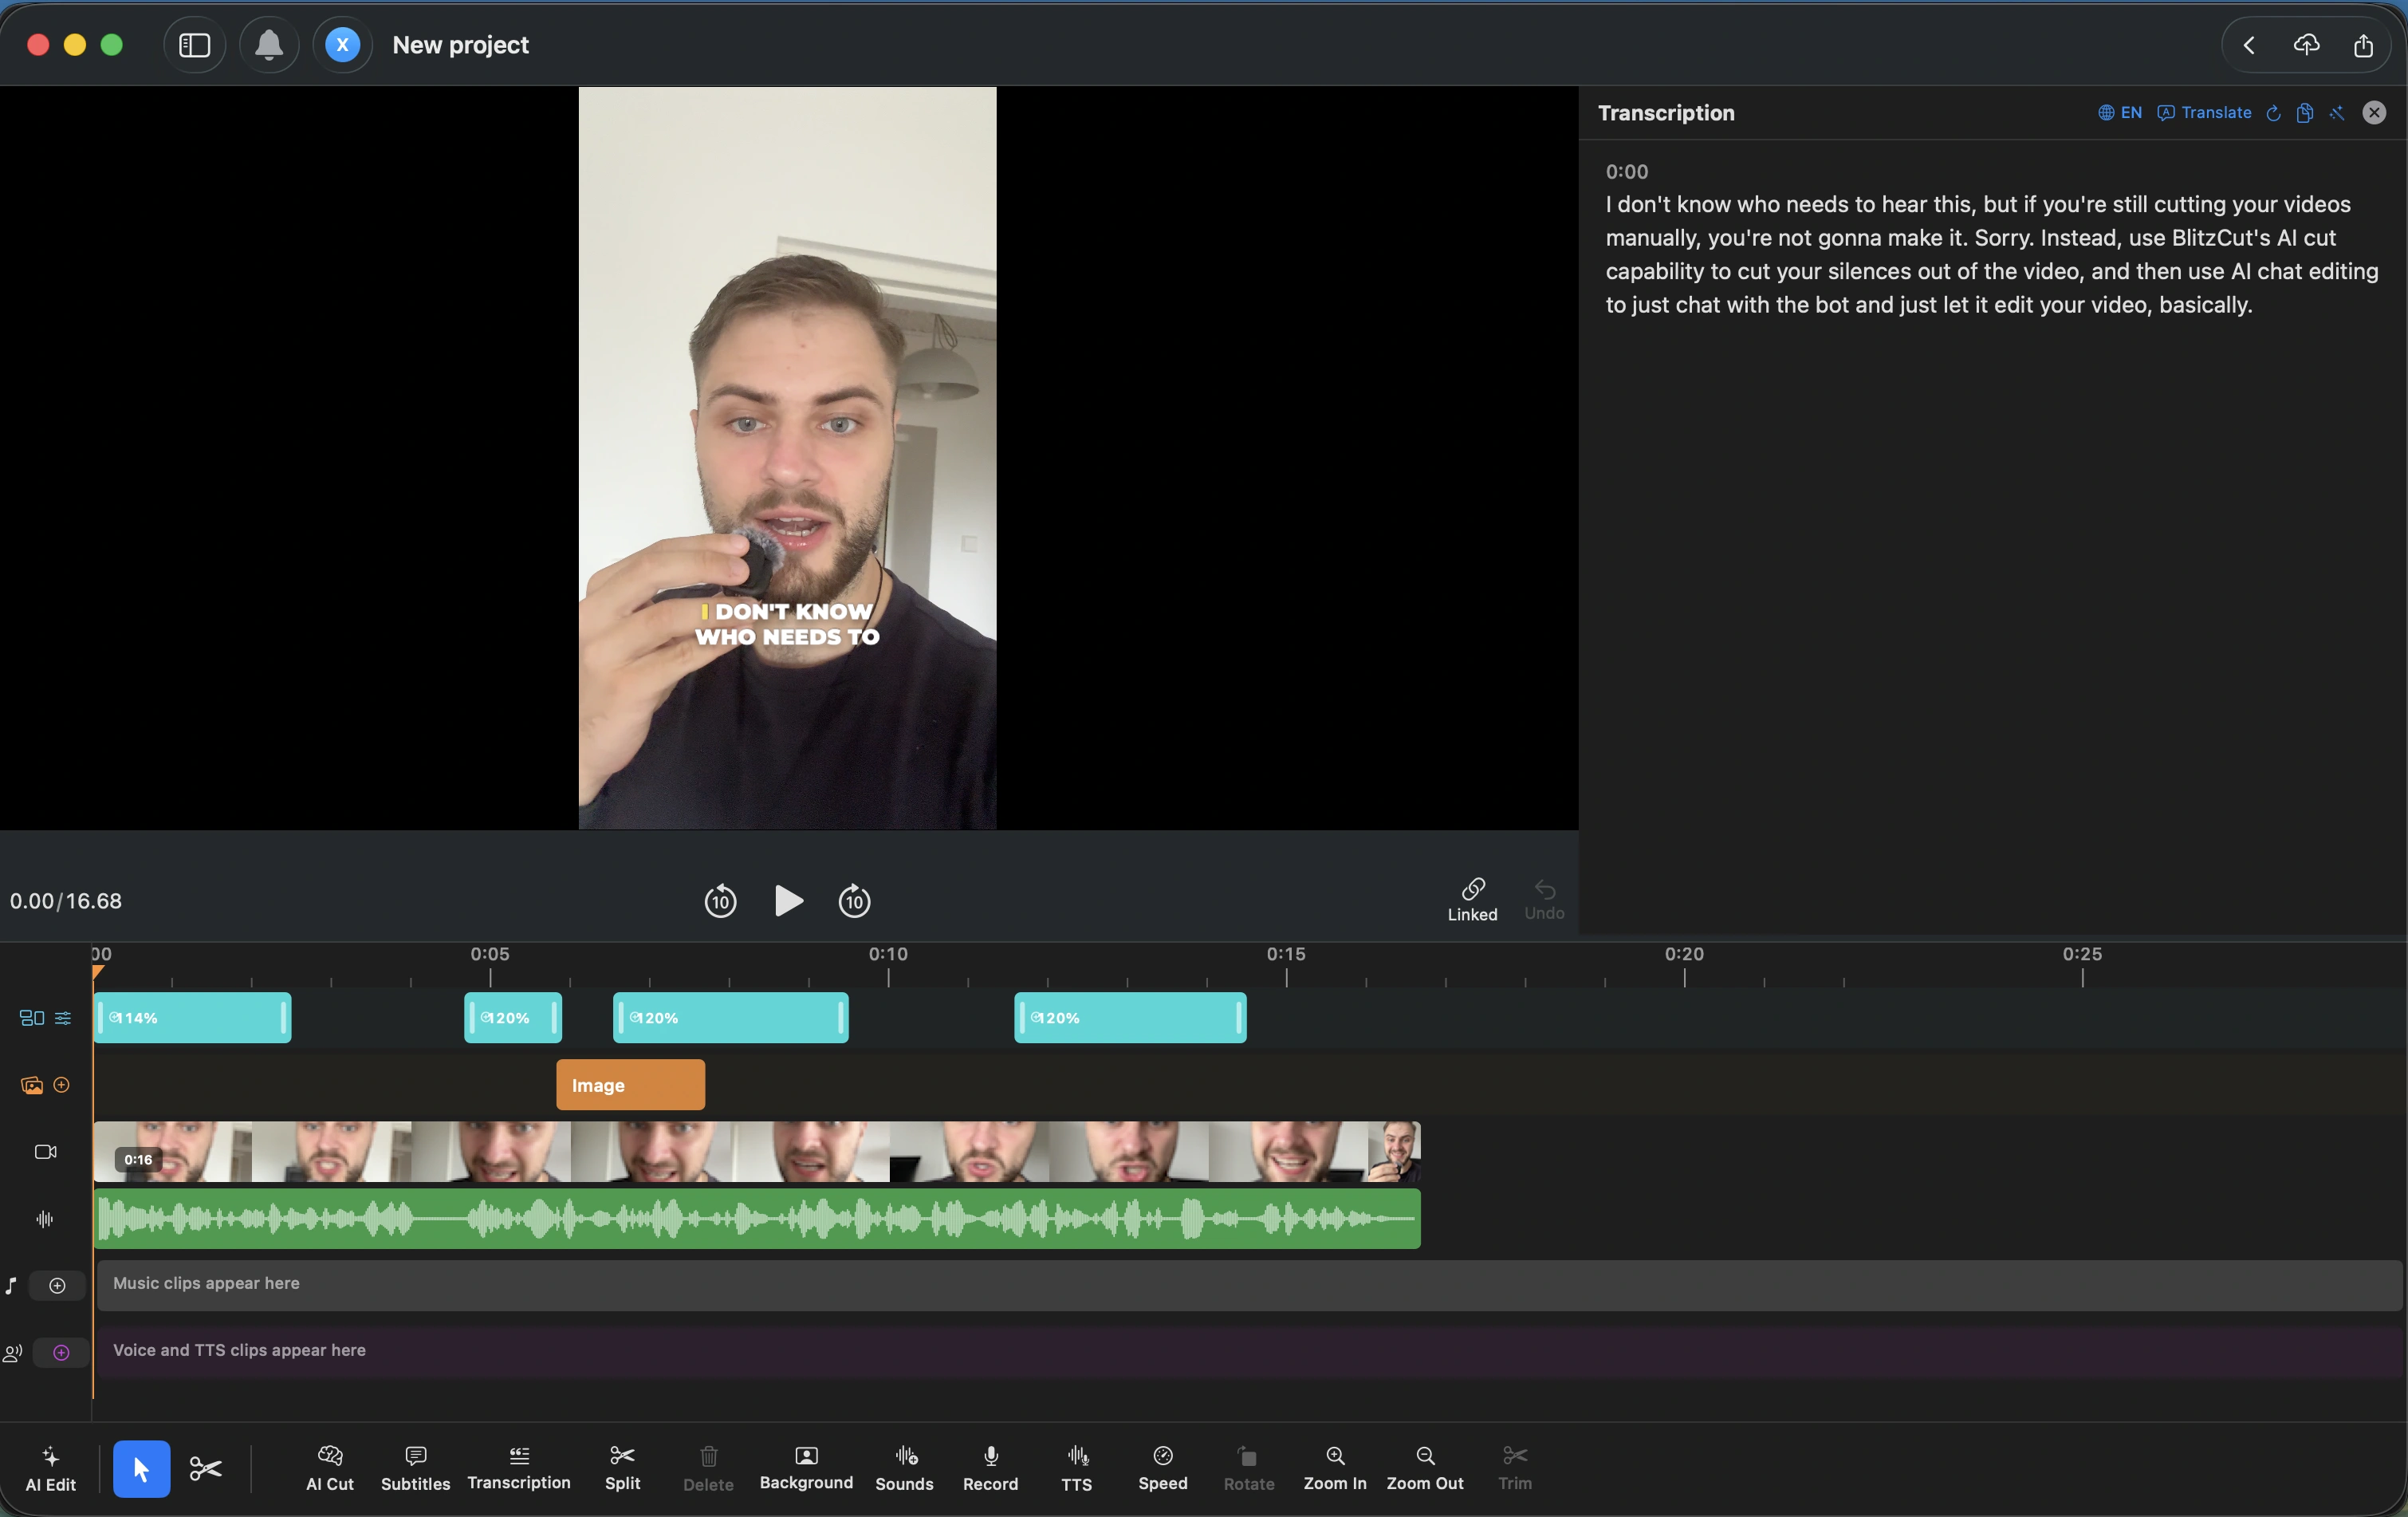
If you narrated a tutorial, the edit that takes longest is cutting the pauses and "um"s. BlitzCut does that automatically on Mac: it removes the silences, lets you cut mistakes by deleting words from the transcript, and adds captions before you export.
Frequently Asked Questions
How do I screen record on Mac with sound?
Press Shift-Command-5, click Options, and choose a microphone to record your voice. To record the sound your Mac plays, also turn on Include System Audio, which needs macOS 27 Golden Gate or later. On older versions of macOS, use a recorder that captures system audio, such as OBS, or a virtual audio driver like BlackHole.
How do I stop screen recording on Mac?
Click the Stop button in the menu bar, or press Command-Control-Esc. Both work for recordings started from the Screenshot toolbar or QuickTime Player.
Where do screen recordings go on Mac?
To your desktop by default, as a .mov file named "Screen Recording" with the date and time. You can change the folder in the Screenshot toolbar under Options, then Save to.
Can I screen record just one window on Mac?
Yes. In the Screenshot toolbar, choose Record Selected Window, click Record, then click the window. This option needs macOS Tahoe 26 or later. On older versions, use Record Selected Portion and drag the area over the window.
Is there a time limit on Mac screen recordings?
Apple doesn't list one. The practical limit is your free storage space, so check how much room you have before a long recording.
What's the shortcut to screen record on Mac?
Shift-Command-5 opens the Screenshot toolbar with the recording options. In QuickTime Player, Control-Command-N starts a new screen recording. Command-Control-Esc stops a recording.
Related: How to Record a Video on Mac · How to Screen Record on iPad · OBS Screen Recorder · Convert MOV to MP4
Editing a talking-head video?
BlitzCut is available on Windows, Android, iPhone, iPad, and Mac. It is designed for recorded UGC-style videos, founder-led ads, tutorials, and testimonials and other talking-head content.
Download BlitzCutRelated Articles
Keep Reading

Black Friday 2026 Video Editing Software Deals: CapCut, DaVinci, Final Cut, Descript and More
Every Black Friday 2026 video editing software deal we could verify: DaVinci Resolve, CapCut, Final Cut Pro, Adobe, Descript, Filmora, BlitzCut, plus what each did last year.

BlitzCut vs Kapwing: App and Browser Editing Compared
Compare BlitzCut and Kapwing for talking-head ads, tutorials, and team content, including Smart Cut, transcript editing, captions, and usage limits.

BlitzCut AI vs KineMaster: Captions and Editing (2026)
Compare KineMaster’s free on-device captions and layered editing with BlitzCut’s recorded talking-head workflow, including export and pricing checks.